Account Portal overview
The Account Portal in Clerk is a powerful feature that allows you to streamline the sign-in, sign-up, and profile management experience for your users, without having to build your own components or host your own pages.

Why use the Account Portal?
The Account Portal provides the pages necessary for your users to sign-up, sign-in, and manage their accounts, all while maintaining seamless integration with your application. These pages are hosted on Clerk servers for you and they require minimal setup to get started. If you're looking for the fastest way to add authentication and user management to your application, then this is a great choice.
However, if you require more precise customization or prefer having your application self-contained, then you can use Clerk's fully customizable prebuilt components, or you can build your own custom user interface using the Clerk API.
How the Account Portal works
The Account Portal uses Clerk's prebuilt components, which are embedded into dedicated pages hosted on Clerk servers.
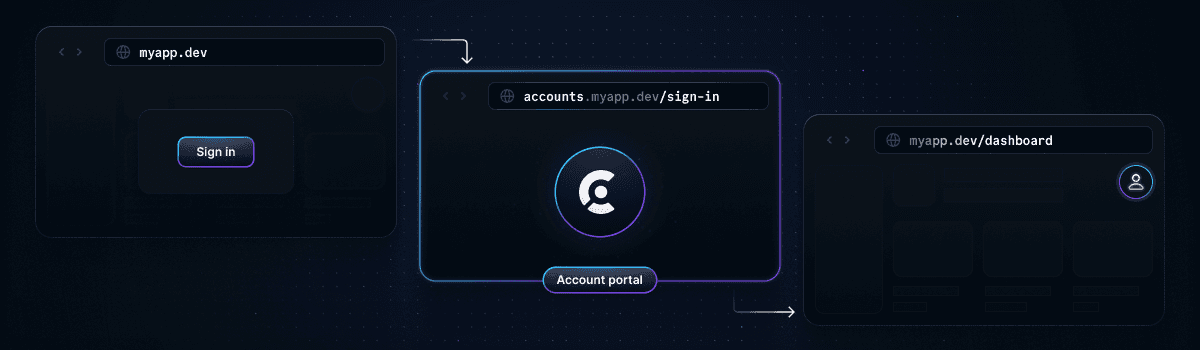
After a user has finished their flow in an Account Portal page, Clerk automatically redirects them back to your application along with the required authentication context. This way, users are automatically redirected to and from your application for a seamless experience.
For each application environment, Clerk provides pages for sign-up, sign-in, user profile, organization profile, and organization creation flow. To integrate the Account Portal into your application, simply embed a Clerk component into your application and Clerk will automatically redirect your users to the Account Portal pages. For example, the <SignUpButton> and <SignInButton> components will redirect users to the Account Portal sign-up and sign-in pages if no props or environment variables are configured to override this behavior.
Accessing your pages
For development environments, Clerk will issue you a randomly generated domain on "accounts.dev". In production, by default, the URLs for your Account Portal are the following:
https://accounts.<your-domain>.com/sign-in
https://accounts.<your-domain>.com/sign-up
https://accounts.<your-domain>.com/user
https://accounts.<your-domain>.com/unauthorized-sign-in
https://accounts.<your-domain>.com/organization
https://accounts.<your-domain>.com/create-organization
To access these links, in the Clerk Dashboard, go to the Account Portal page and then open the Pages tab.
Customizing your pages
These pages cannot be customized beyond the options provided in the Clerk Dashboard. If you need more customization such as localization, consider using prebuilt components or building your own custom user interface.
Disabling the Account Portal
To disable the Account Portal:
- In the Clerk Dashboard, navigate to the Account Portal page.
- Select Disable Account Portal on the right-side. You will not be able to select this button until you have set up an authentication flow for your users, as applying this setting will immediately result in a 404 for all Account Portal pages.
Handle Clerk flows
Once you have disabled the Account Portal, you are fully responsible for providing your own flows, such as sign-up and sign-in. Clerk provides a set of prebuilt components that you can use. If prebuilt components don't meet your specific needs or if you require more control over the logic, you can rebuild the existing Clerk flows using the Clerk API. See the custom flows guides for more information. It's highly recommended that even if you use either of these options, you keep the Account Portal enabled for testing purposes and as a fallback for users.
Linking to Account Portal pages
If a user accesses an Account Portal page directly, the redirect_url query param will not be present, so the user cannot be redirected back to your application once they are finished with their Account Portal flow. To prevent this, it is recommend that you always specify the redirect in the link when sharing it.
You can use the following format for your direct links:
https://accounts.<your-domain.com>/<account-portal-page>?redirect_url=<your-redirect-url>
Example
https://accounts.myapp.com/sign-in?redirect_url=https://myapp.com/dashboard
The domain is myapp.com, the user is being linked to the sign-in Account Portal page at http://accounts.myapp.com/sign-in and they will be redirected to https://myapp.com/dashboard after they are signed in.
Fallback redirects
In the case that a user does visit an Account Portal page directly without the query param, you can set up fallback redirects to ensure that the user is redirected back to your application after they are finished with their Account Portal flow.
- Sign-up and sign-in: Set the appropriate environment variables to configure the fallback redirects for sign-in and sign-up.
- Sign out: Set the post-sign-out redirect by passing the
afterSignOutUrlprop to the<ClerkProvider>component. See the reference doc for more information. - Organization redirects: Both the
<OrganizationProfile />and<OrganizationSwitcher />components accept anafterLeaveOrganizationUrlprop for setting the redirect after leaving an organization. The<OrganizationSwitcher />component accepts anafterSelectOrganizationUrlprop for setting the redirect after selecting an organization, and anafterCreateOrganizationUrlprop for setting the redirect after creating an organization. - Prefill sign-up and sign-in fields: Can be specified via the following query parameters:
email_address,phone_number,username,first_name, andlast_name. For example, visitinghttps://accounts.example.com/sign-in?username=nickwill result in the username field being prefilled with the valuenick.
Available Account Portal pages
Sign-in
The sign-in page hosts the prebuilt <SignIn /> component, which renders a UI for signing in users. The functionality of the <SignIn /> component is controlled by the instance settings you specify in the Clerk Dashboard, such as sign-up and sign-in options and social connections.
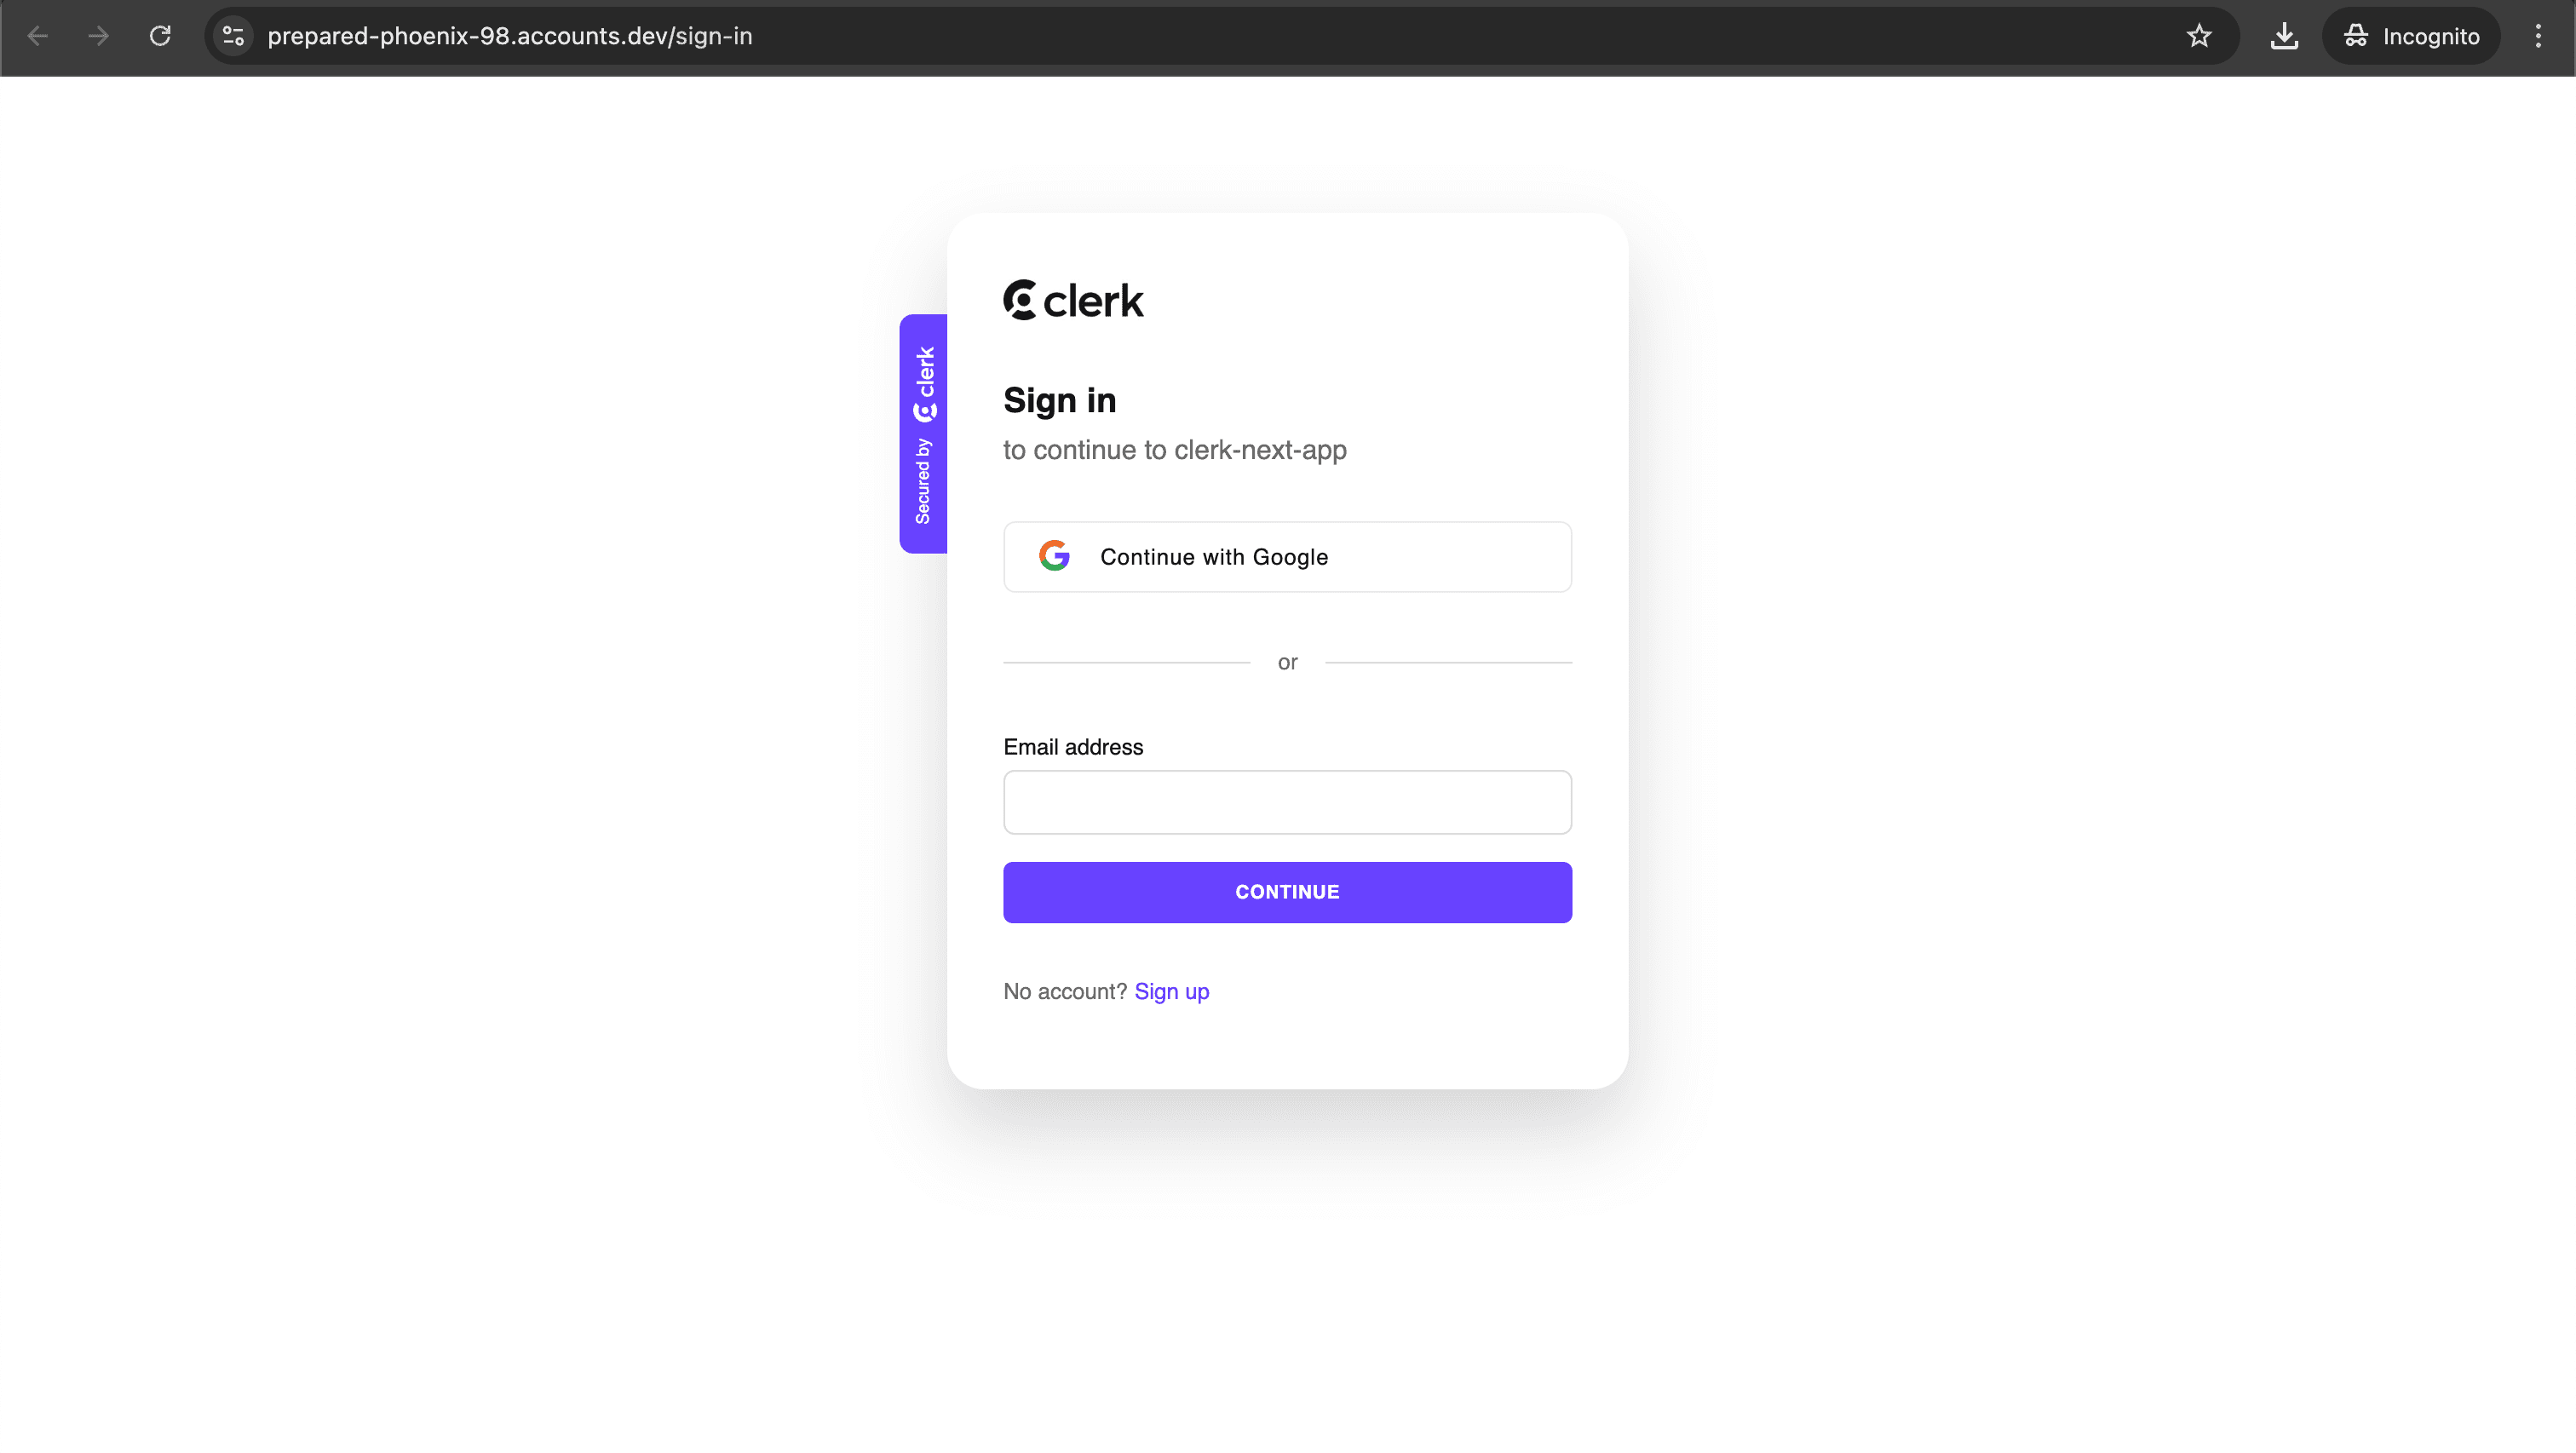
Redirect users to the sign-in page using the <RedirectToSignIn /> control component.
Sign-up
The sign-up page hosts the prebuilt <SignUp /> component, which renders a UI for signing up users. The functionality of the <SignUp /> component is controlled by the instance settings you specify in the Clerk Dashboard, such as sign-up and sign-in options and social connections.
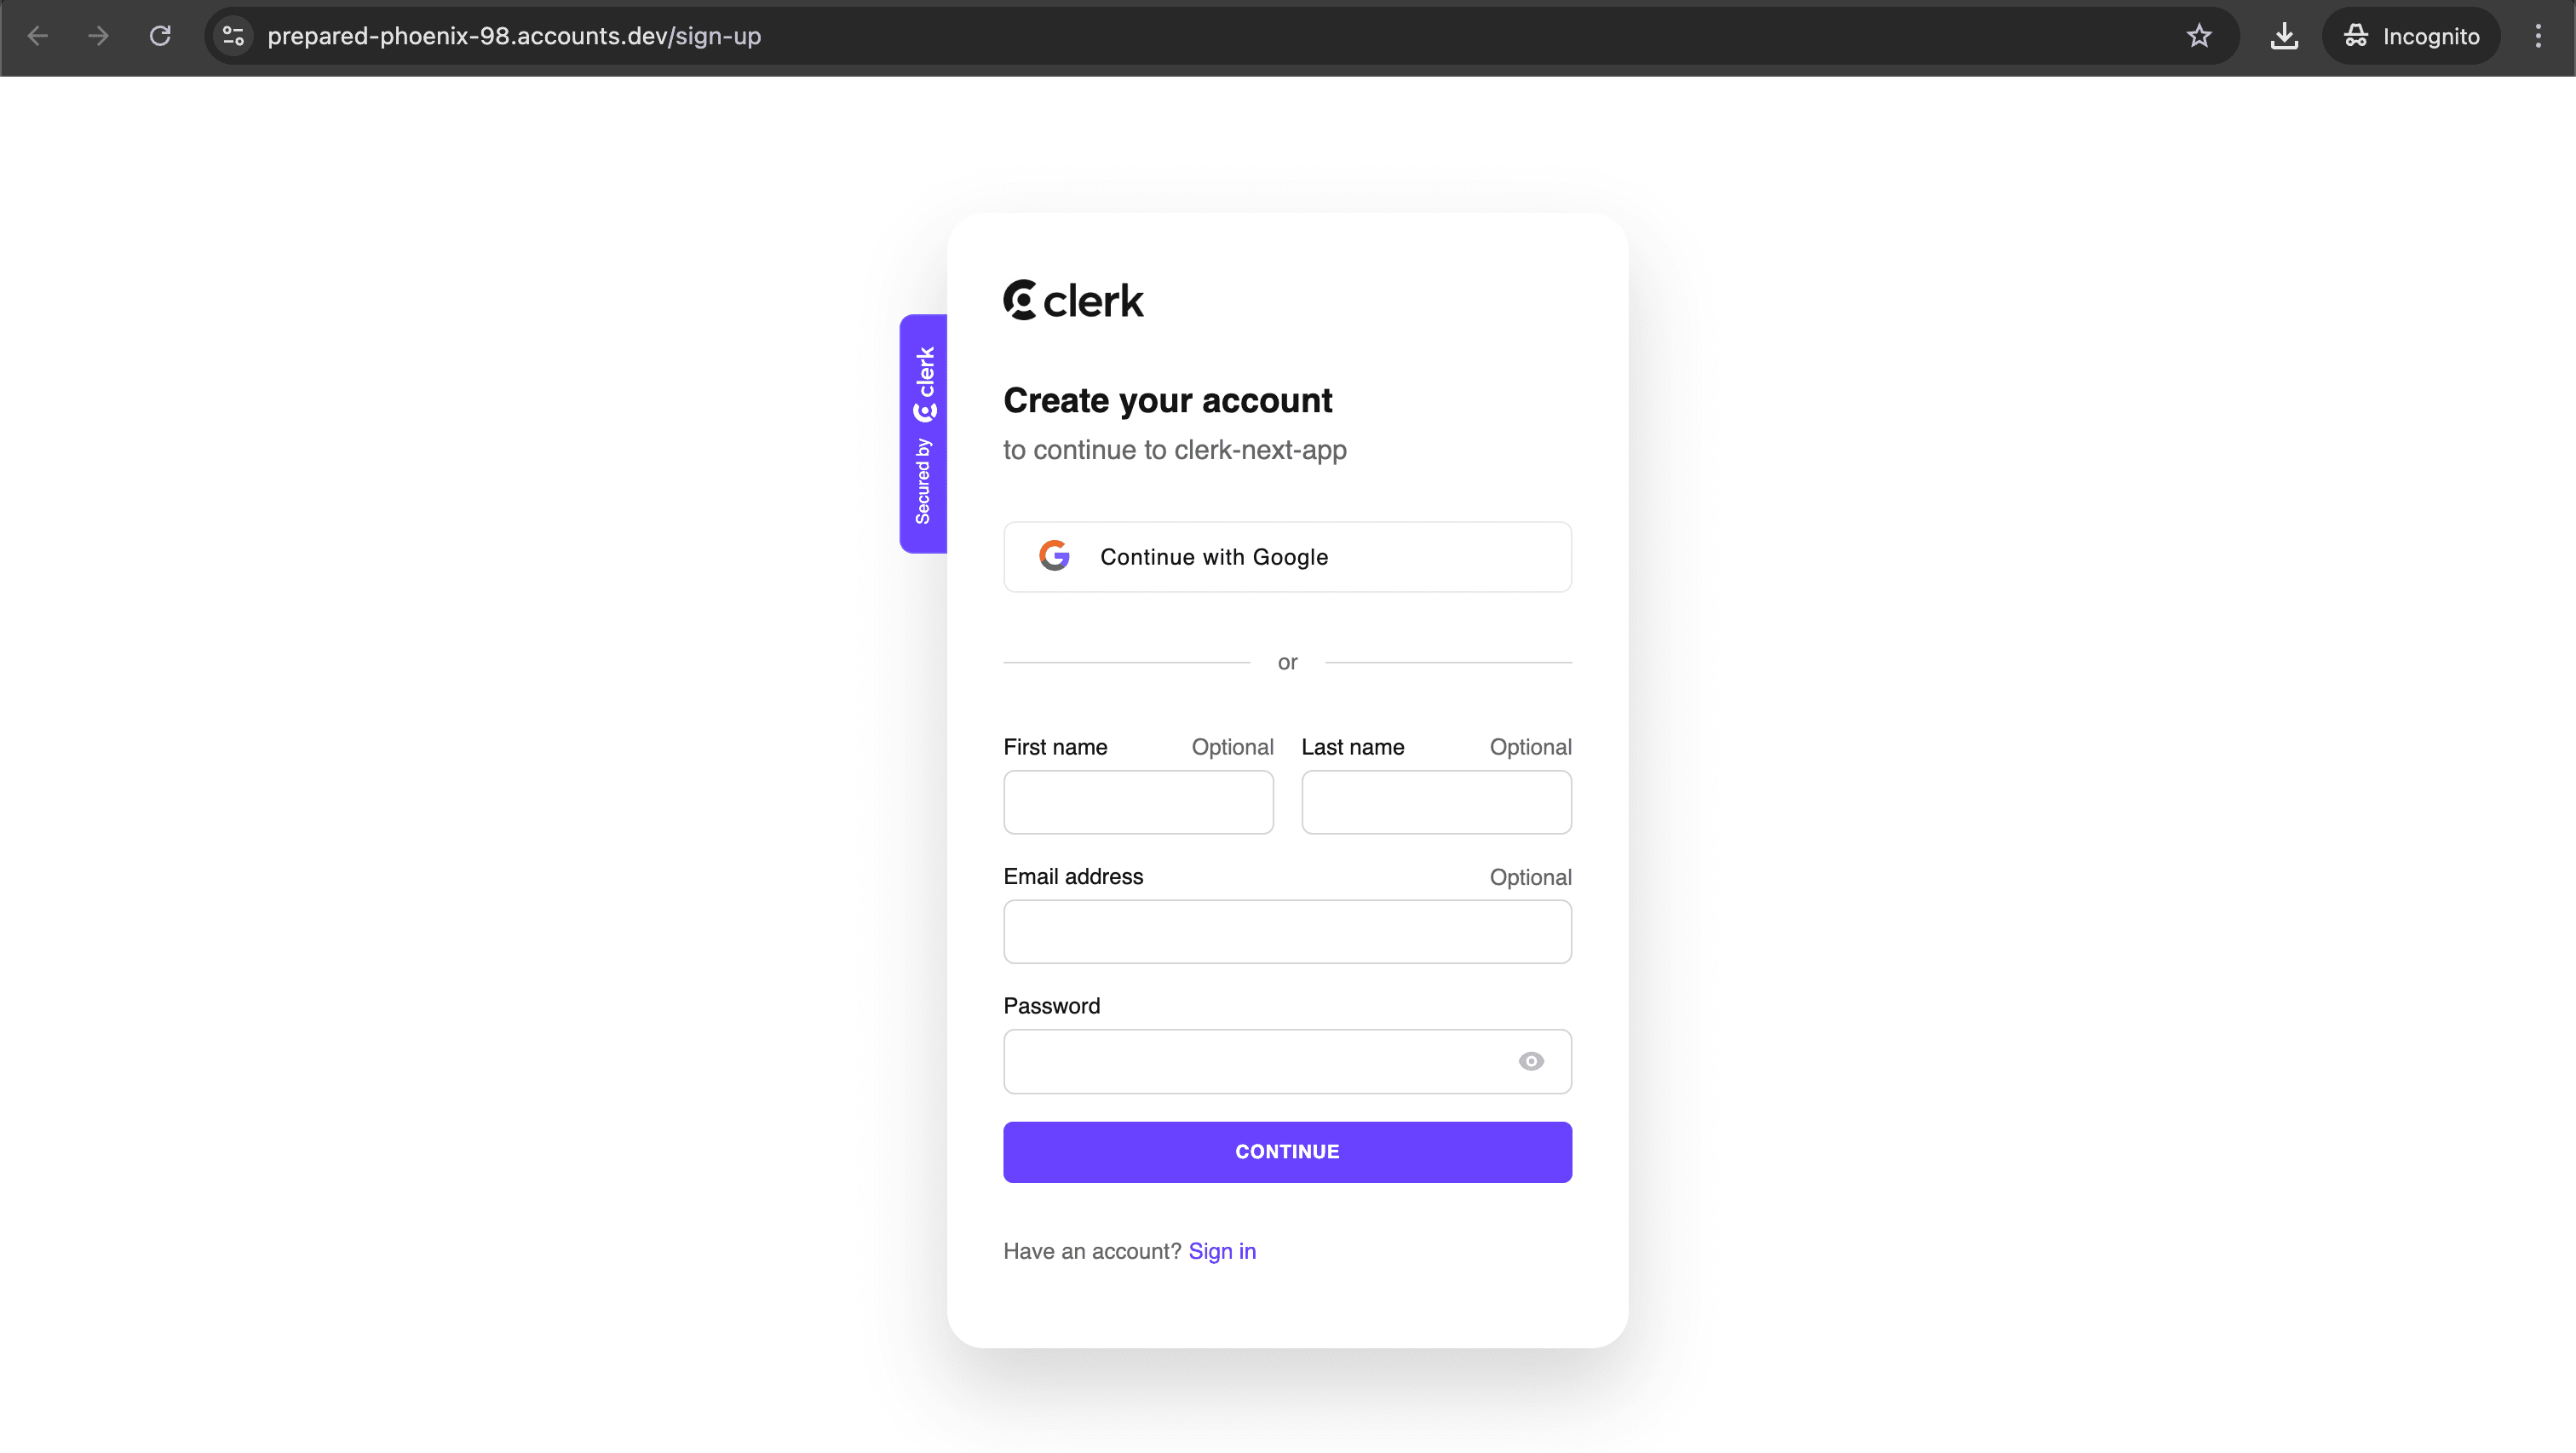
Redirect users to the sign-up page using the <RedirectToSignUp /> control component.
User profile
The user profile page hosts the prebuilt <UserProfile /> component, which renders a beautiful, full-featured account management UI that allows users to manage their profile and security settings.
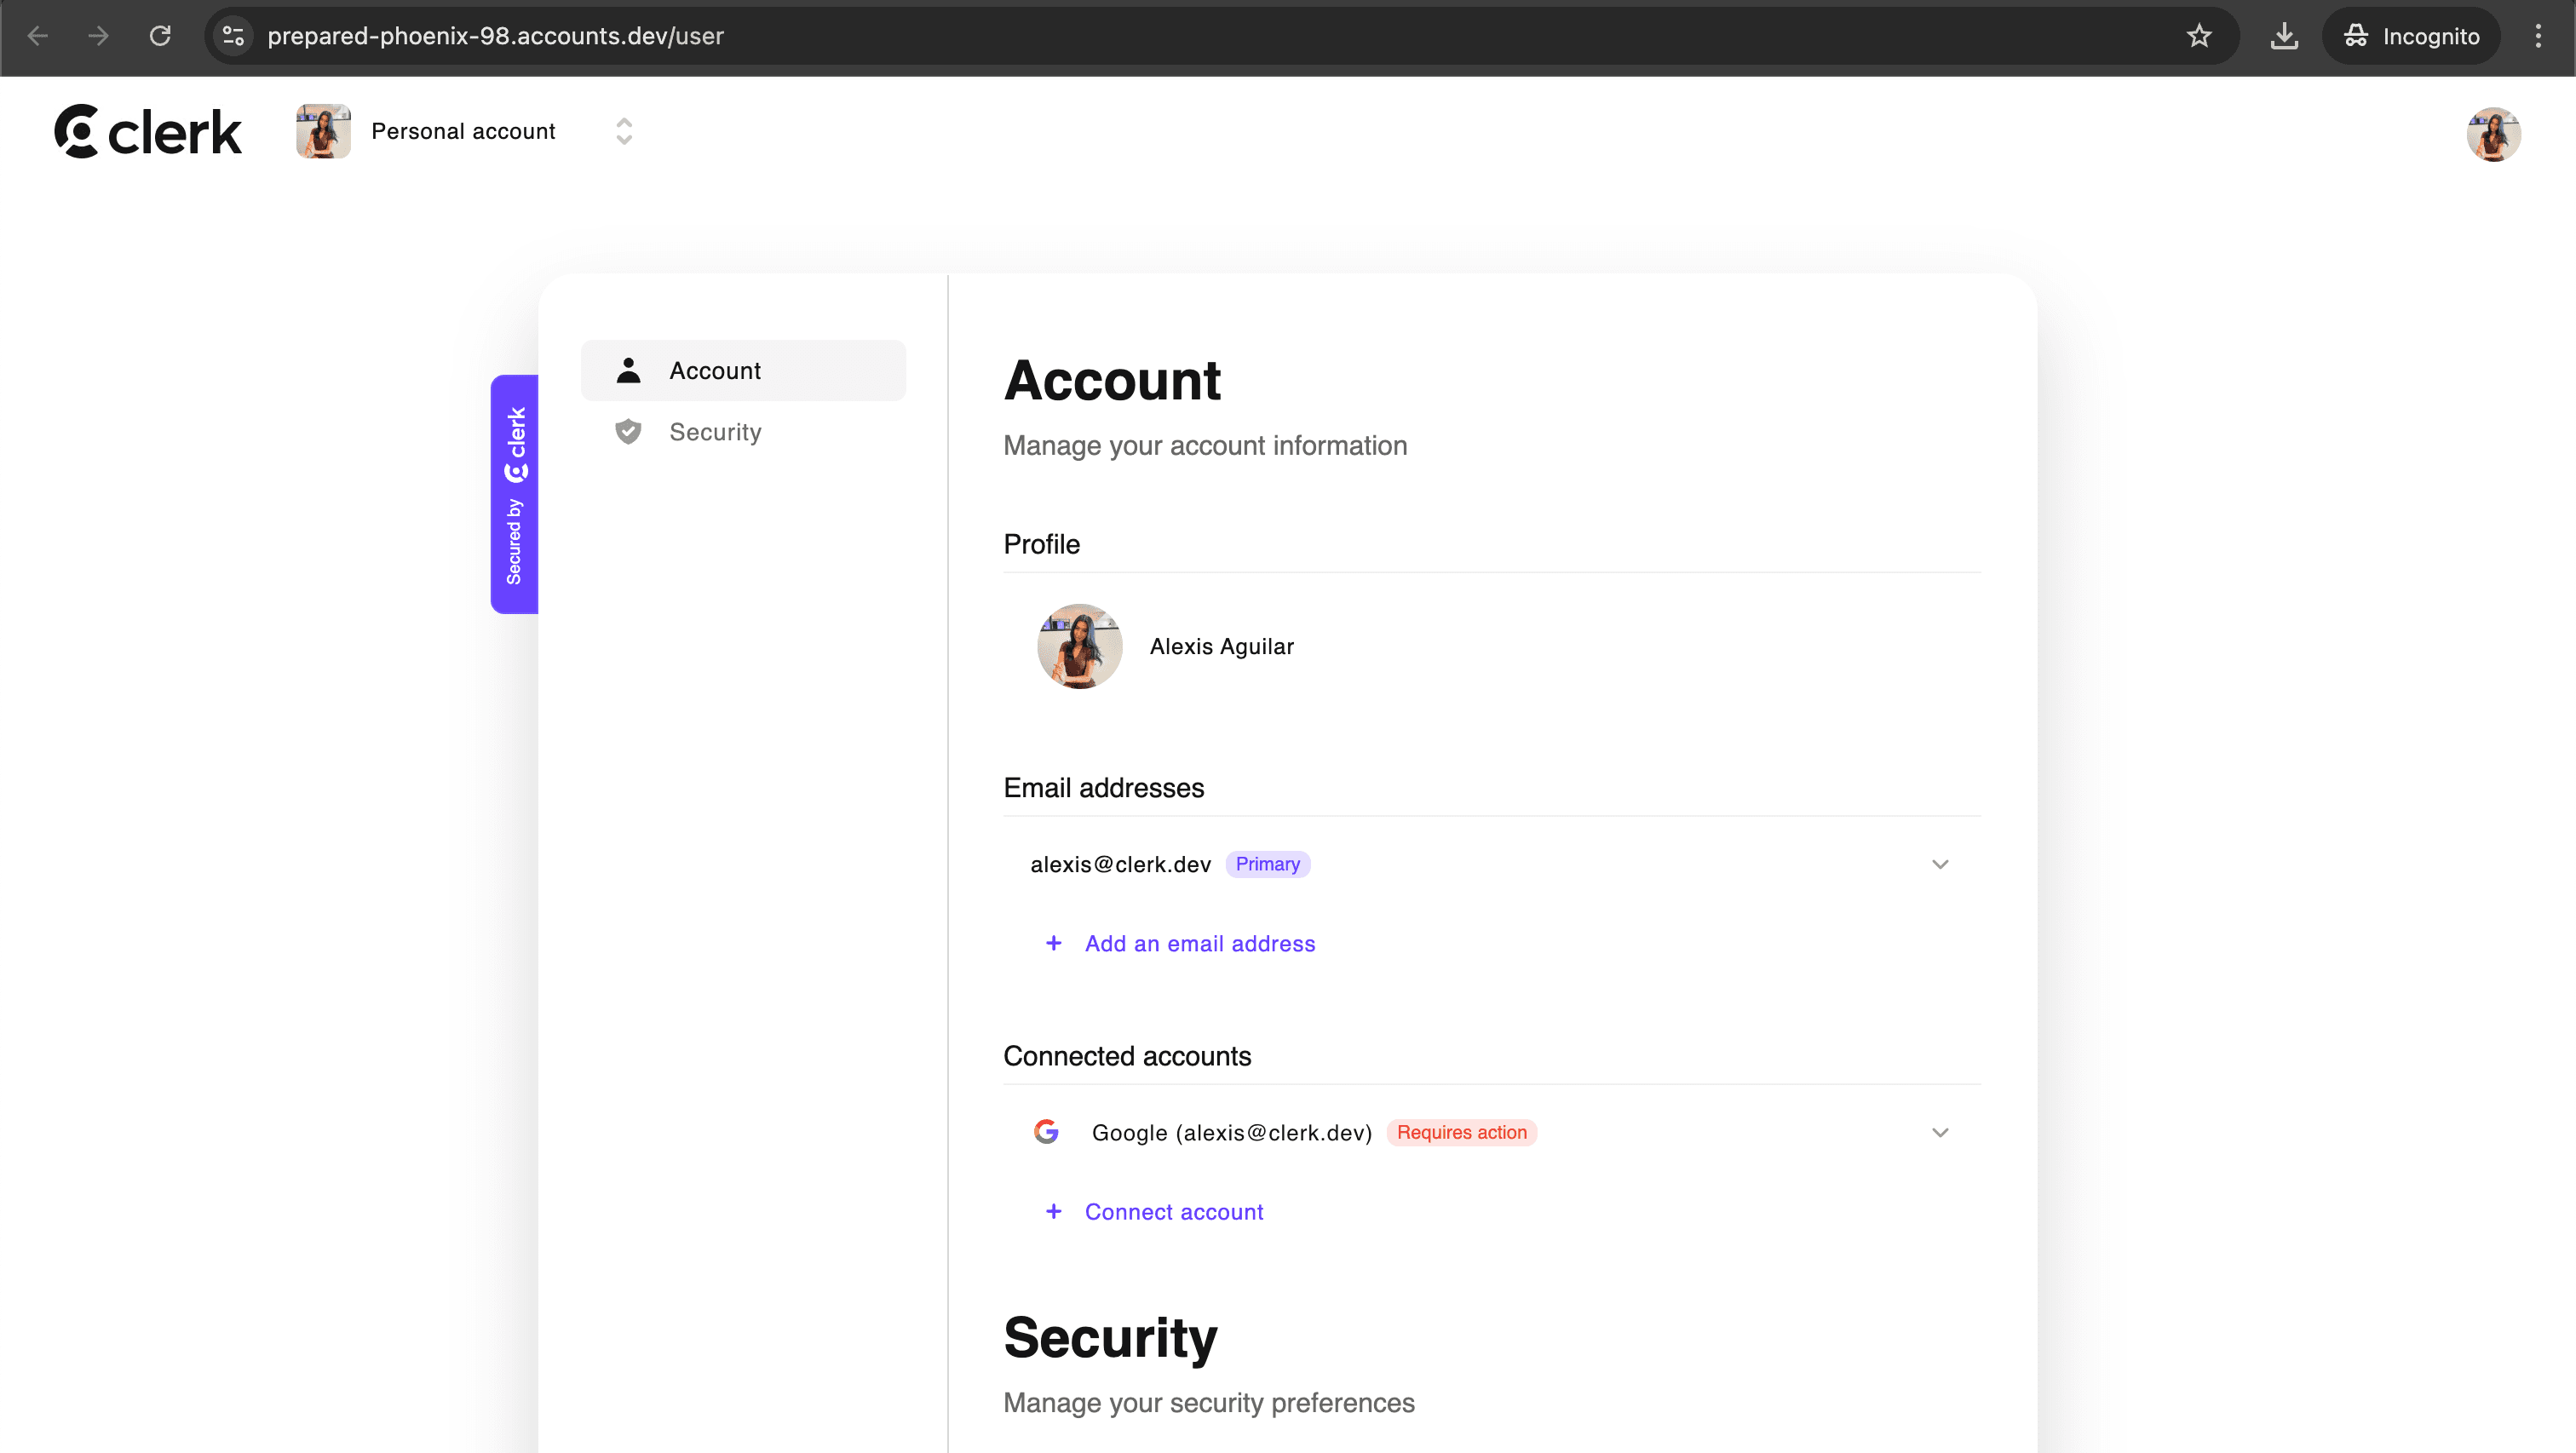
Redirect your authenticated users to their user profile page using the <RedirectToUserProfile /> control component.
Unauthorized sign-in
The unauthorized sign-in page doesn't host any prebuilt Clerk component. It displays a UI confirming that a session from an unrecognized device was successfully revoked. For more information, see the Unauthorized sign-in feature.
The unauthorized sign-in page displays a UI confirming that a session from an unrecognized device was successfully revoked. For more information, refer to the reference.

Create organization
The create organization page hosts the prebuilt <CreateOrganization /> component, which provides a streamlined interface for users to create new organizations within your application.
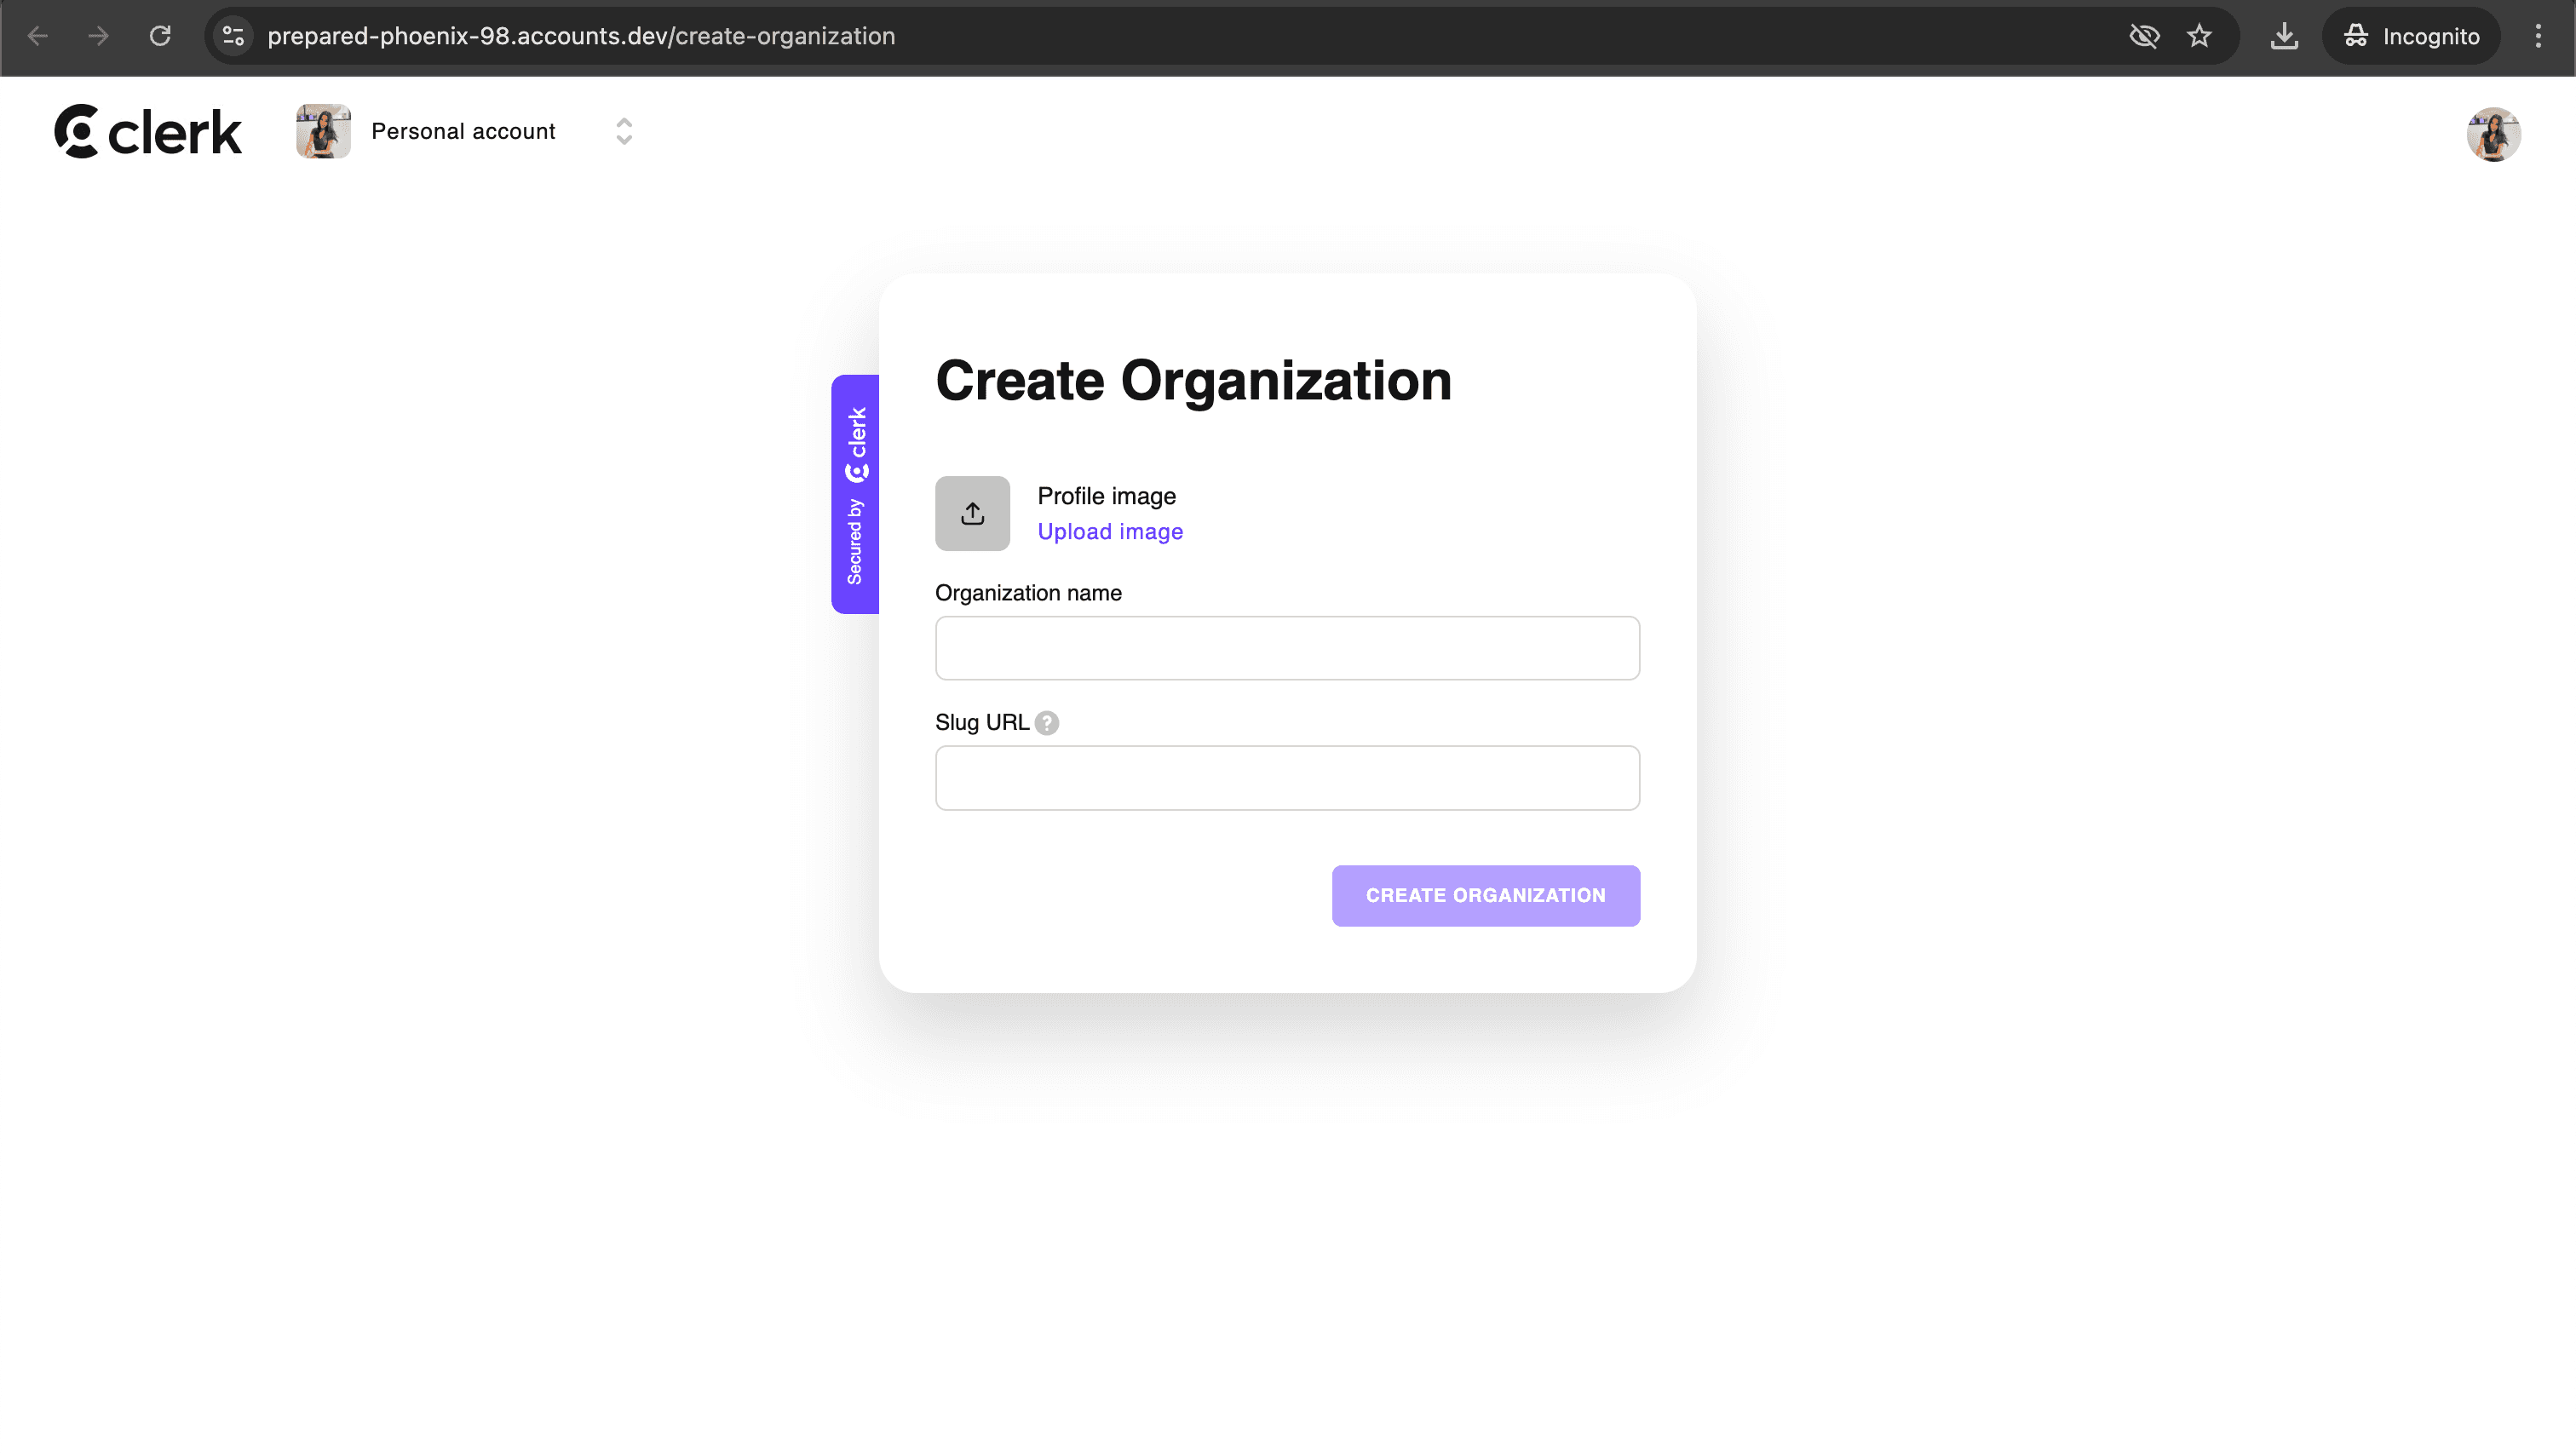
Redirect your authenticated users to the create organization page using the <RedirectToCreateOrganization /> control component.
Organization profile
The user profile page hosts the prebuilt <OrganizationProfile /> component, which renders a beautiful, full-featured organization management UI that allows users to manage their organization profile and security settings.
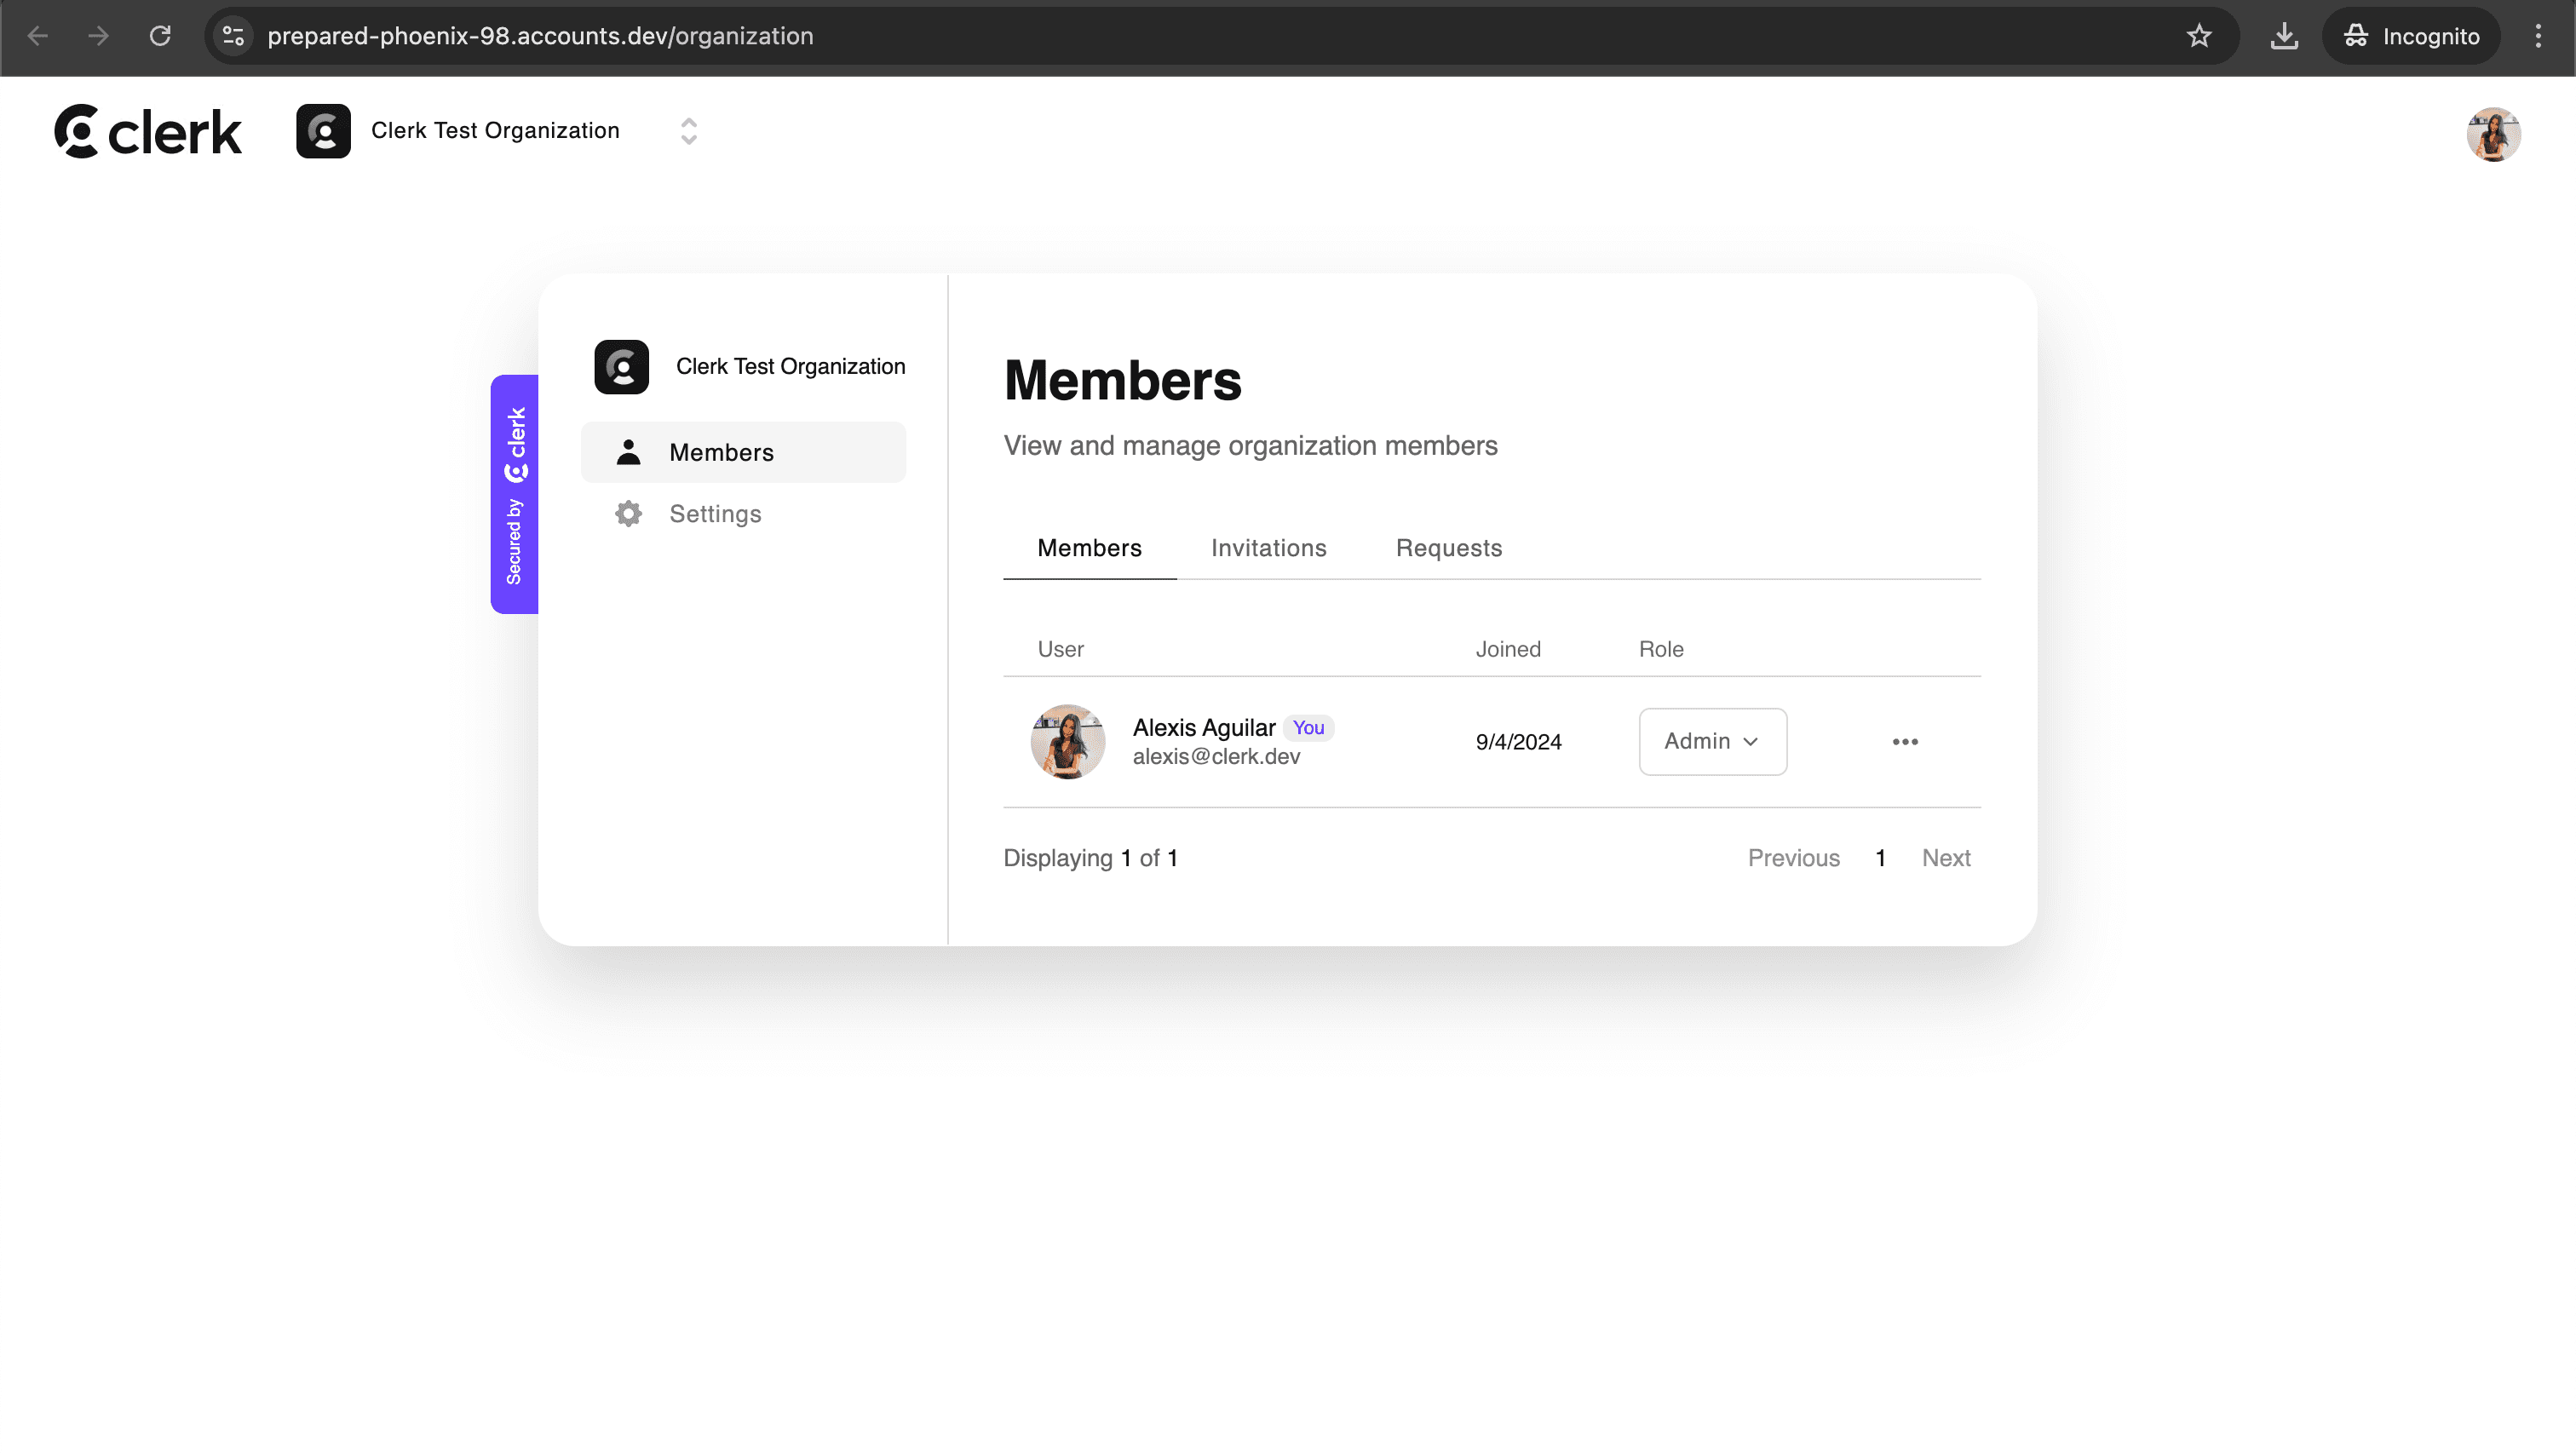
Redirect your authenticated users to their organization profile page using the <RedirectToOrganizationProfile /> control component.
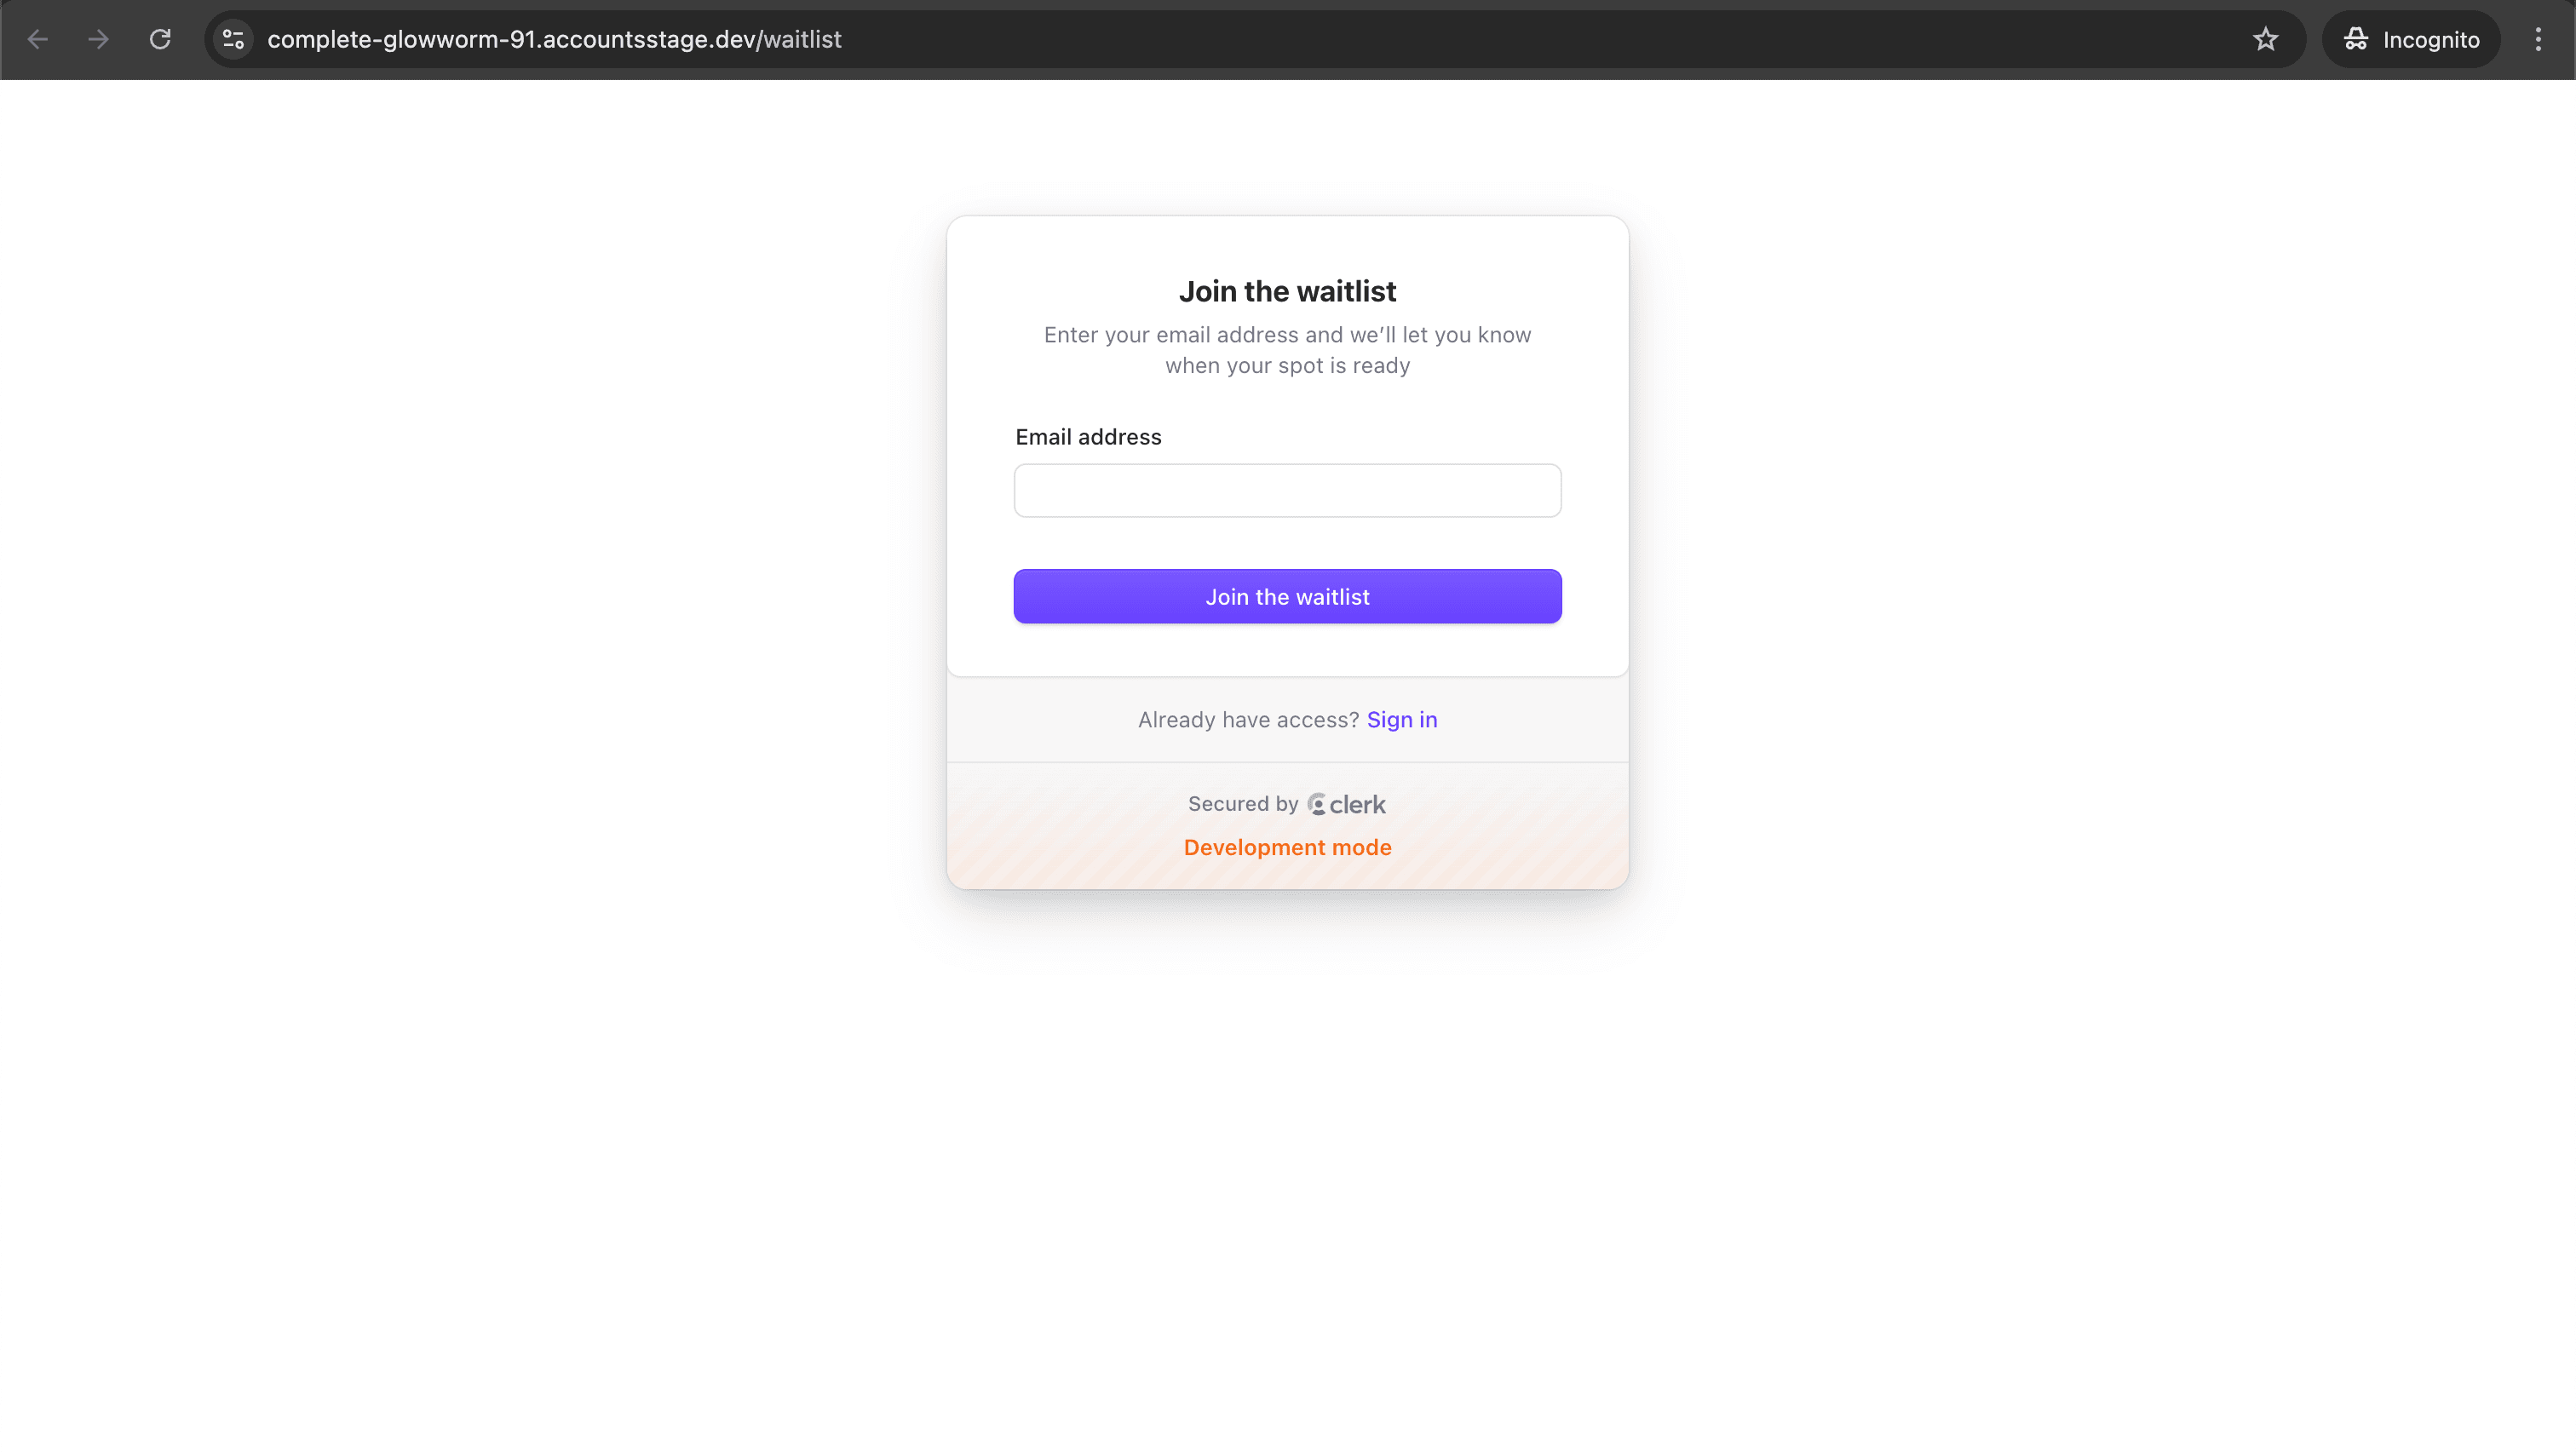
Waitlist
The waitlist page hosts the prebuilt <Waitlist /> component which renders a form that allows users to join for early access to your app.
Feedback
Last updated on