Customize your session token
Session tokens are JWTs generated by Clerk on behalf of your instance, and convey an authenticated user session to your backend.
By default, session tokens contain claims that are required for Clerk to function. You can learn more about these "default claims" in the session tokens documentation.
This guide will show you how to customize a session token to include additional claims that you may need in your application.
Add custom claims to your session token
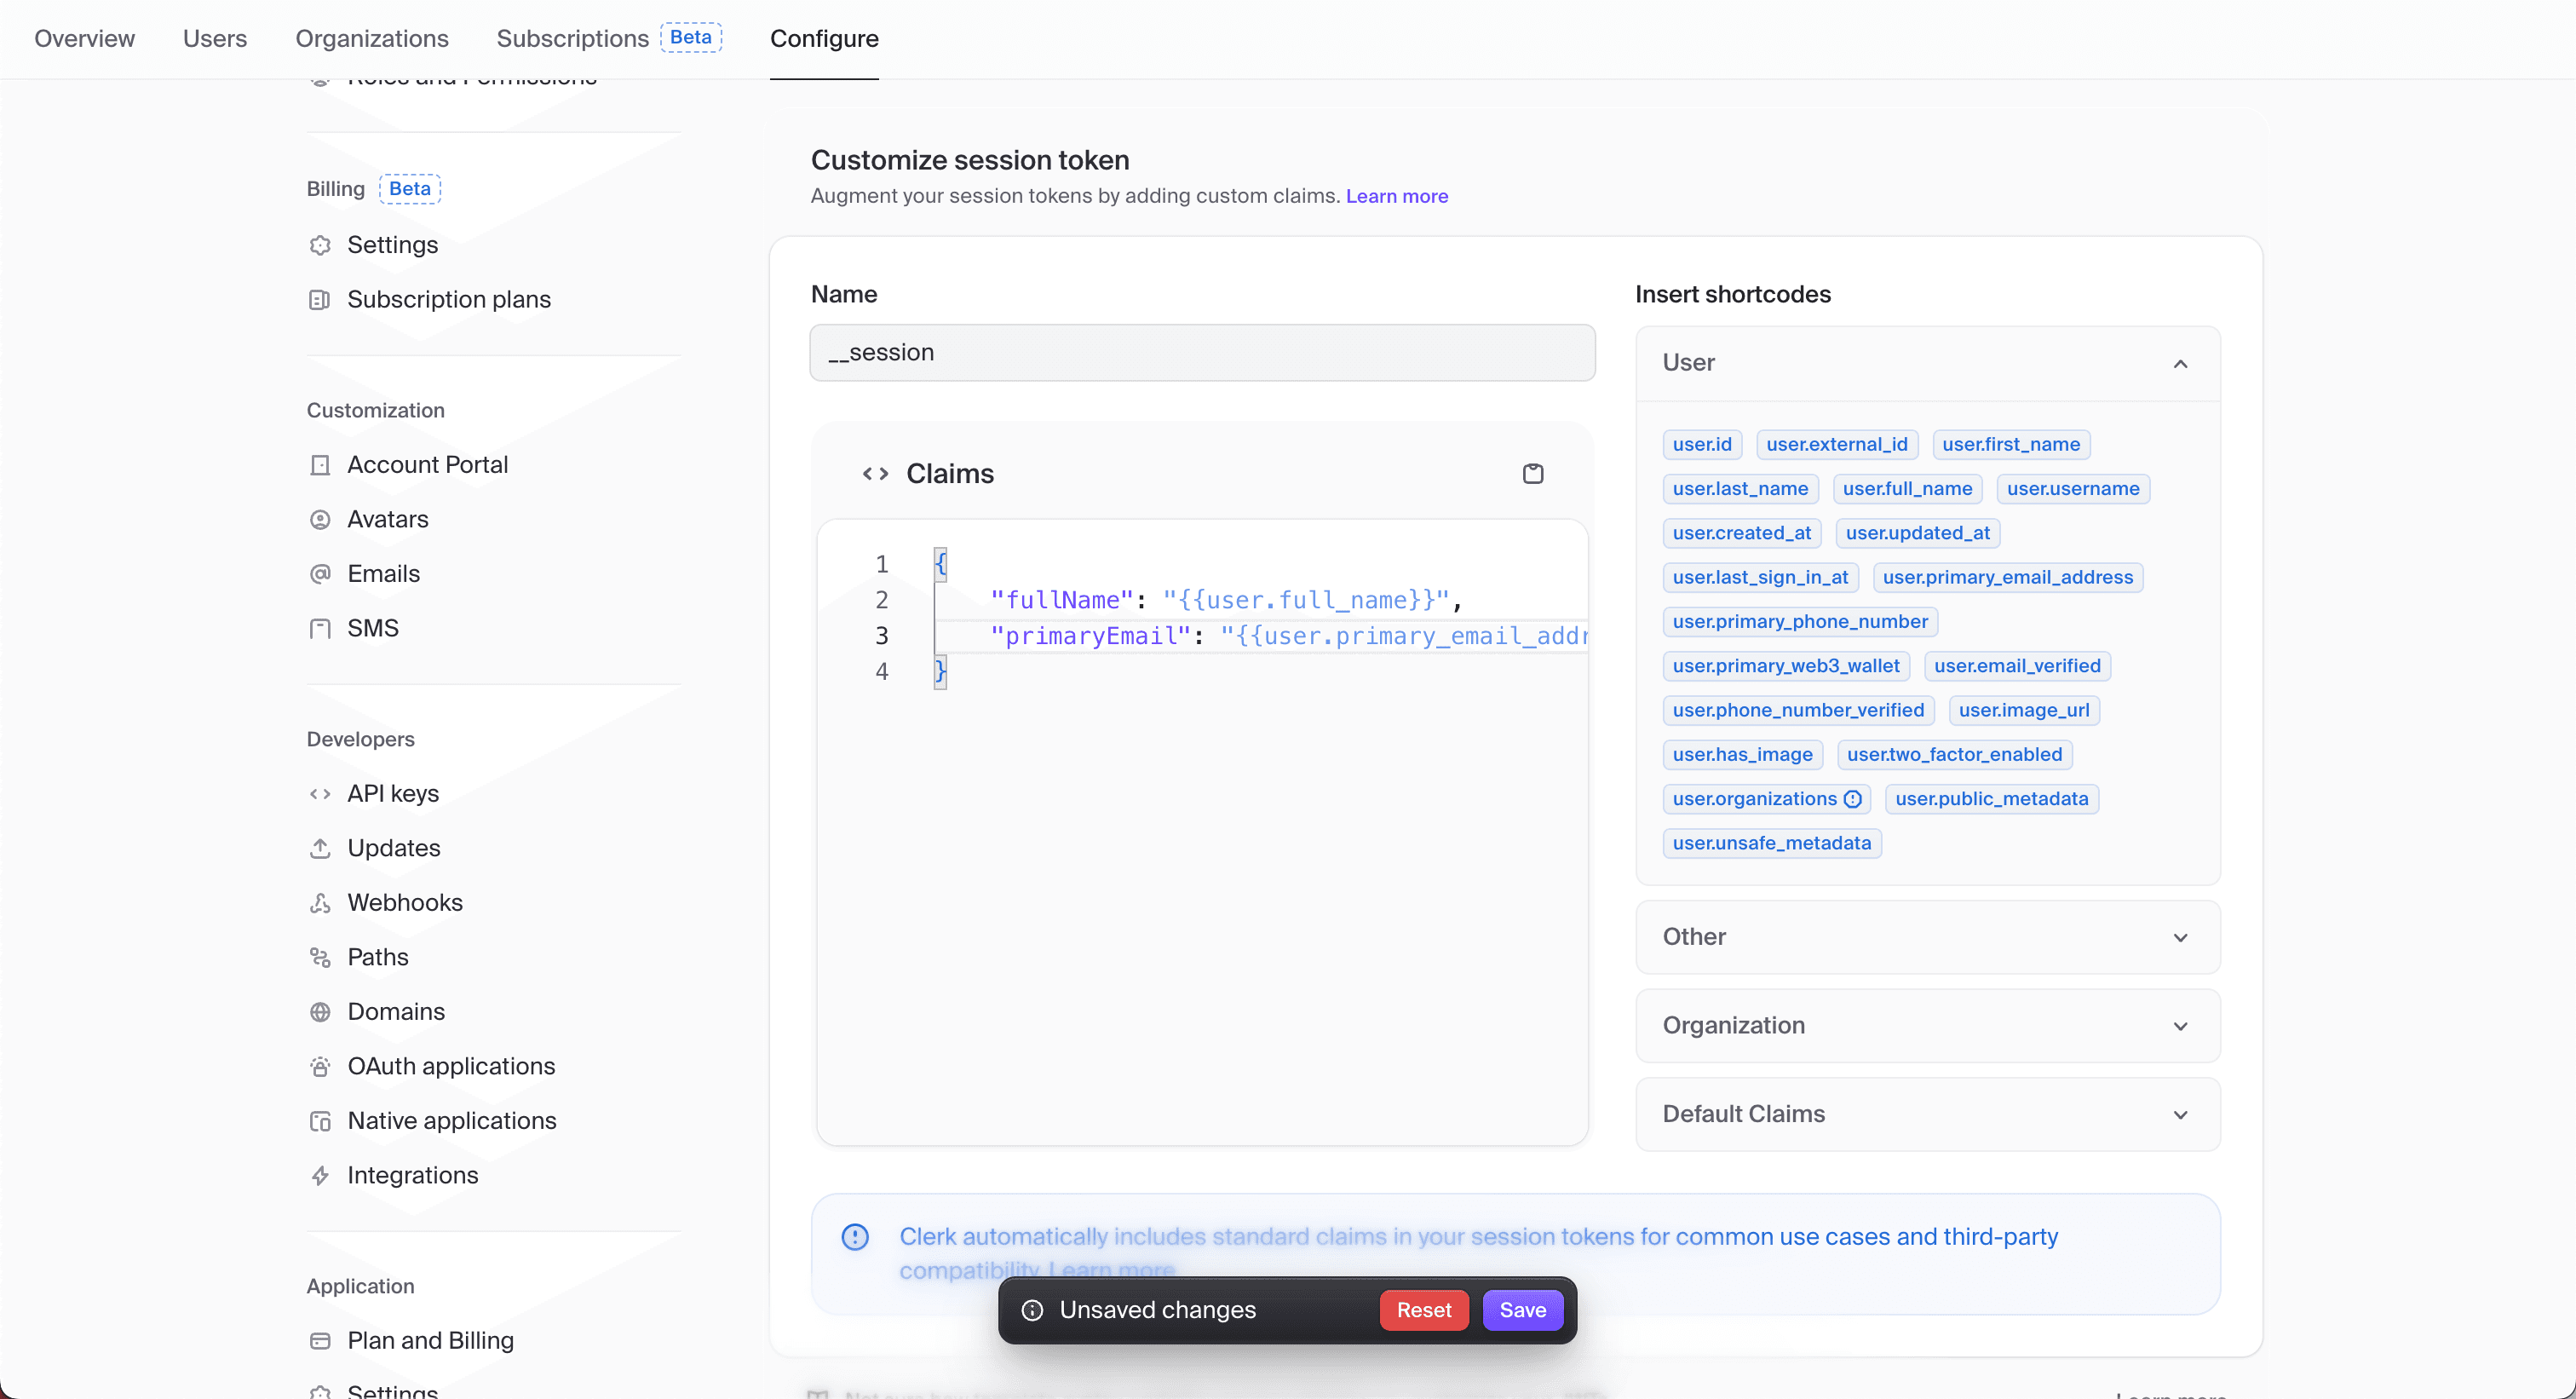
- In the Clerk Dashboard, navigate to the Sessions page.
- Under Customize session token, in the Claims editor, you can add any claim to your session token that you need and select Save.
The following example adds the fullName and primaryEmail claims to the session token.
Use the custom claims in your application
The Auth object includes a sessionClaims property that contains the custom claims you added to your session token. Accessing the Auth object differs depending on the framework you are using. See the reference doc for more information.
The following example demonstrates how to access the fullName and primaryEmail claims that were added to the session token in the last step.
For Next.js, the Auth object is accessed using the auth() helper in App Router apps and the getAuth() function in Pages Router apps. Learn more about using these helpers.
import { auth } from '@clerk/nextjs/server'
import { NextResponse } from 'next/server'

export async function GET() {
  const { sessionClaims } = await auth()

  const fullName = sessionClaims?.fullName

  const primaryEmail = sessionClaims?.primaryEmail

  return NextResponse.json({ fullName, primaryEmail })
}import { getAuth } from '@clerk/nextjs/server'
import type { NextApiRequest, NextApiResponse } from 'next'
export default async function handler(req: NextApiRequest, res: NextApiResponse) {
// Use `getAuth()` to get the user's ID and session claims
const { sessionClaims } = getAuth(req)
const fullName = sessionClaims.fullName
const primaryEmail = sessionClaims.primaryEmail
return res.status(200).json({ fullName, primaryEmail })
}For Astro, the Auth object is accessed using the locals.auth() function. Learn more about using locals.auth().
import type { APIRoute } from 'astro'

export const GET: APIRoute = async ({ locals }) => {
  // Use `locals.auth()` to get the user's ID and session claims
  const { userId, sessionClaims } = await locals.auth()

  // Protect the route by checking if the user is signed in
  if (!userId) {
    return new Response('Unauthorized', { status: 401 })
  }

  const fullName = sessionClaims.fullName

  const primaryEmail = sessionClaims.primaryEmail

  return new Response(JSON.stringify({ fullName, primaryEmail }))
}
For Express, the Auth object is accessed using the getAuth() function. Learn more about using getAuth().
import { clerkMiddleware, getAuth, requireAuth } from '@clerk/express'
import express from 'express'

const app = express()
const PORT = 3000

// Apply `clerkMiddleware()` to all routes
app.use(clerkMiddleware())

// Use `getAuth()` to get the session claims
const getSessionClaims = (req, res, next) => {
  const { sessionClaims } = getAuth(req)

  const fullName = sessionClaims.fullName

  const primaryEmail = sessionClaims.primaryEmail

  return res.status(200).json({ fullName, primaryEmail })
}

app.get('/profile', requireAuth(), getSessionClaims)

// Start the server and listen on the specified port
app.listen(PORT, () => {
  console.log(`Server is running on http://localhost:${PORT}`)
})
For React Router, the Auth object is accessed using the getAuth() function. Learn more about using getAuth().
import { redirect } from 'react-router'
import { getAuth } from '@clerk/react-router/ssr.server'
import { createClerkClient } from '@clerk/react-router/api.server'
import type { Route } from './+types/profile'

export async function loader(args: Route.LoaderArgs) {
  // Use `getAuth()` to get the user's ID and session claims
  const { userId, sessionClaims } = await getAuth(args)

  // Protect the route by checking if the user is signed in
  if (!userId) {
    return redirect('/sign-in?redirect_url=' + args.request.url)
  }

  const fullName = sessionClaims.fullName

  const primaryEmail = sessionClaims.primaryEmail

  return {
    fullName: JSON.stringify(fullName),
    primaryEmail: JSON.stringify(primaryEmail),
  }
}

export default function Profile({ loaderData }: Route.ComponentProps) {
  return (
    <div>
      <p>Welcome {loaderData.fullName}</p>
      <p>Your email is {loaderData.primaryEmail}</p>
    </div>
  )
}
For Remix, the Auth object is accessed using the getAuth() function. Learn more about using getAuth().
import { LoaderFunction, redirect } from '@remix-run/node'
import { getAuth } from '@clerk/remix/ssr.server'
import { createClerkClient } from '@clerk/remix/api.server'

export const loader: LoaderFunction = async (args) => {
  // Use `getAuth()` to retrieve the user's ID and session claims
  const { userId, sessionClaims } = await getAuth(args)

  // If there is no userId, then redirect to sign-in route
  if (!userId) {
    return redirect('/sign-in?redirect_url=' + args.request.url)
  }

  const fullName = sessionClaims.fullName

  const primaryEmail = sessionClaims.primaryEmail

  return { fullName, primaryEmail }
}
For Tanstack React Start, the Auth object is accessed using the getAuth() function. Learn more about using getAuth().
import { getAuth } from '@clerk/tanstack-react-start/server'
import { json } from '@tanstack/react-start'
import { createServerFileRoute } from '@tanstack/react-start/server'

export const ServerRoute = createServerFileRoute().methods({
  GET: async ({ request, params }) => {
    // Use `getAuth()` to retrieve the user's ID and session claims
    const { userId, sessionClaims } = await getAuth(request)

    // Protect the API route by checking if the user is signed in
    if (!userId) {
      return json({ error: 'Unauthorized' }, { status: 401 })
    }

    const fullName = sessionClaims.fullName

    const primaryEmail = sessionClaims.primaryEmail

    return json({ fullName, primaryEmail })
  },
})
Add global TypeScript type for custom session claims
To get auto-complete and prevent TypeScript errors when working with custom session claims, you can define a global type.
- In your application's root folder, add a
typesdirectory. - Inside of the
typesdirectory, add aglobals.d.tsfile. - Create the
CustomJwtSessionClaimsinterface and declare it globally. - Add the custom claims to the
CustomJwtSessionClaimsinterface.
The following example demonstrates how to add the fullName and primaryEmail claims to the CustomJwtSessionClaims interface.
export {}

declare global {
  interface CustomJwtSessionClaims {
    fullName?: string
    primaryEmail?: string
  }
}
Feedback
Last updated on