Sync Clerk data to your backend with webhooks
A common set up for applications involves a frontend for customers to interact with a backend that includes a database. Since authentication and user management happens on Clerk's side, data eventually needs to reach the application's backend.
The recommended way to sync data between Clerk and your application's backend is via webhooks. In this guide, you'll learn how to enable webhooks and how to set up your backend so that it is updated every time an event happens on your Clerk instance.
Given the asynchronous nature of webhooks, they might not fit in every use case out there but they are a great fit for most applications.
Enable webhooks
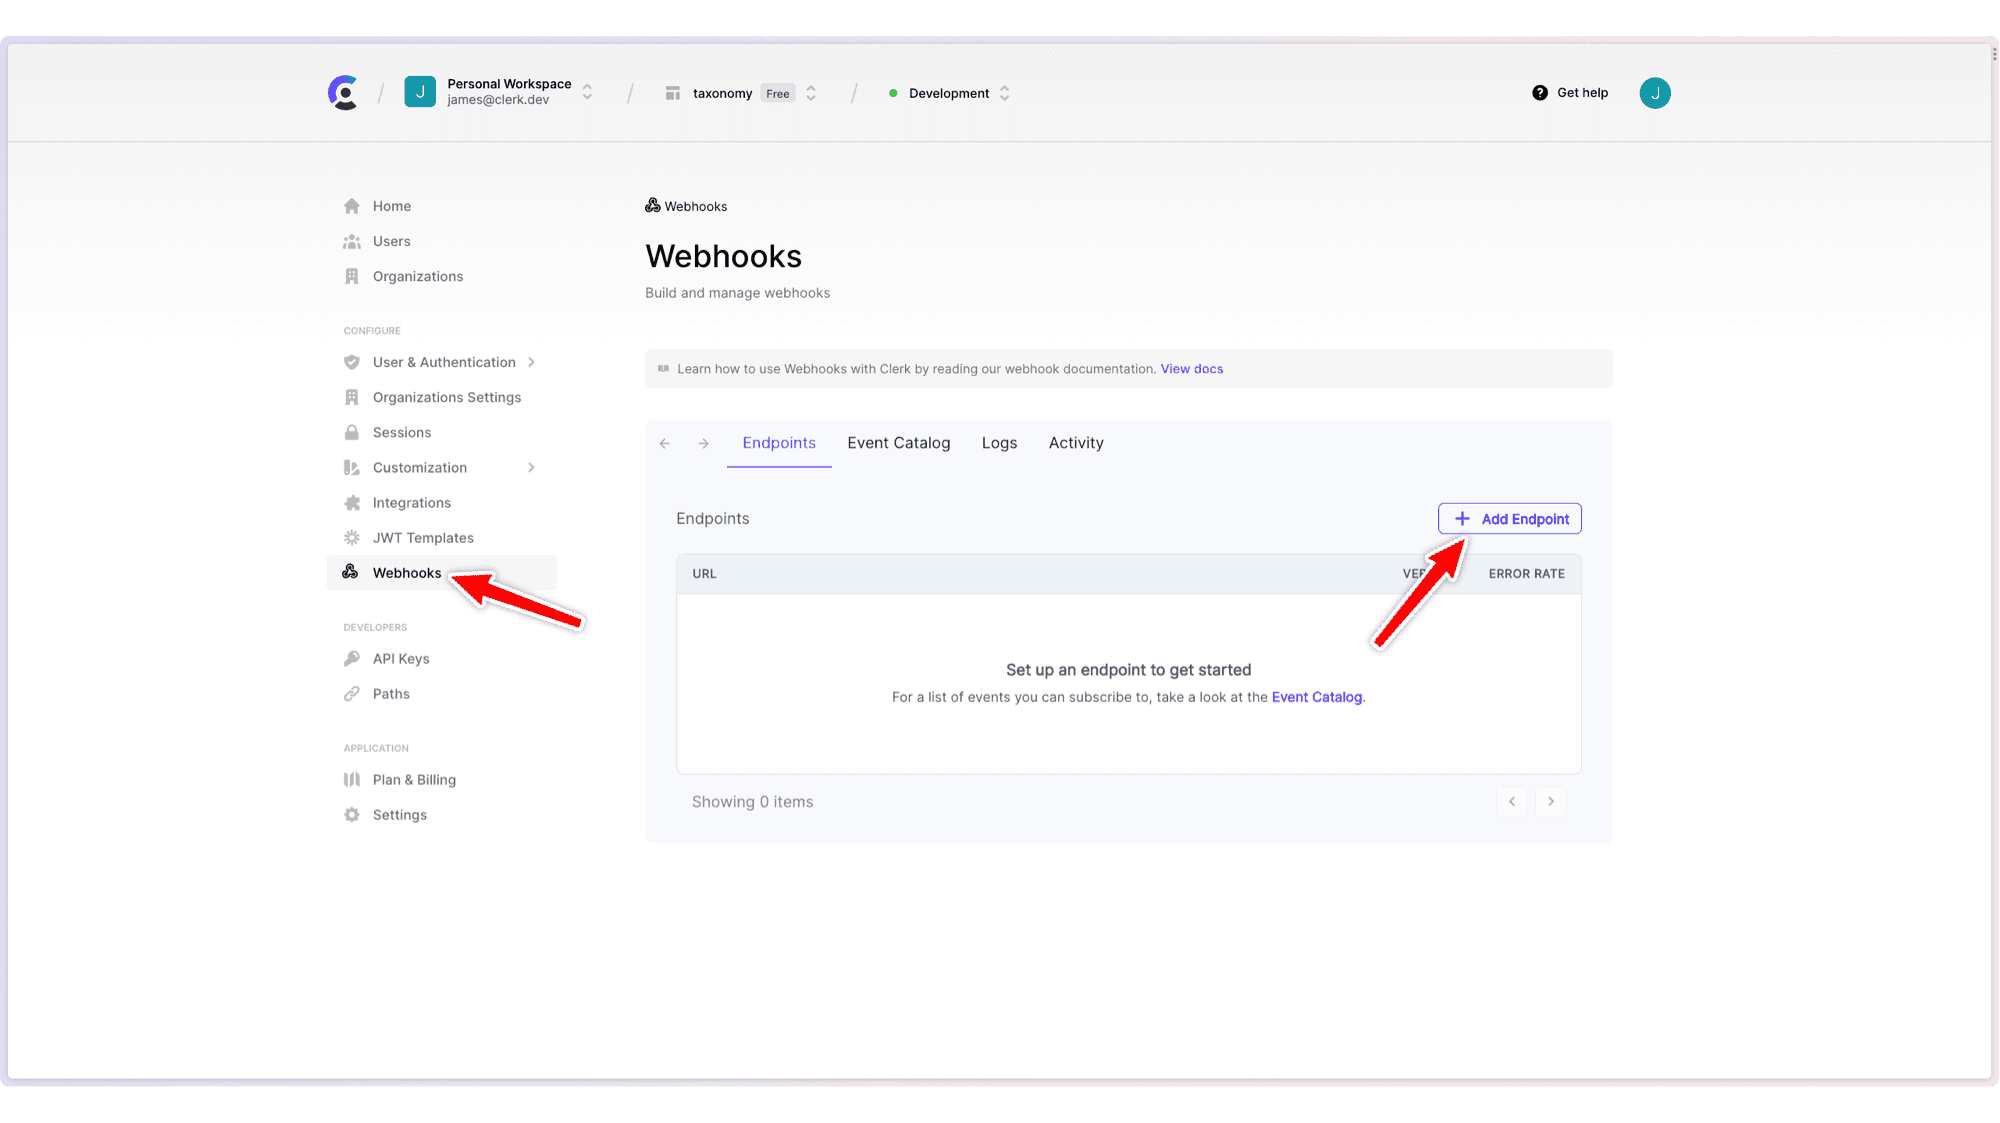
To enable webhooks, go to the Clerk Dashboard and navigate to the Webhooks page. Select the Add Endpoint button.
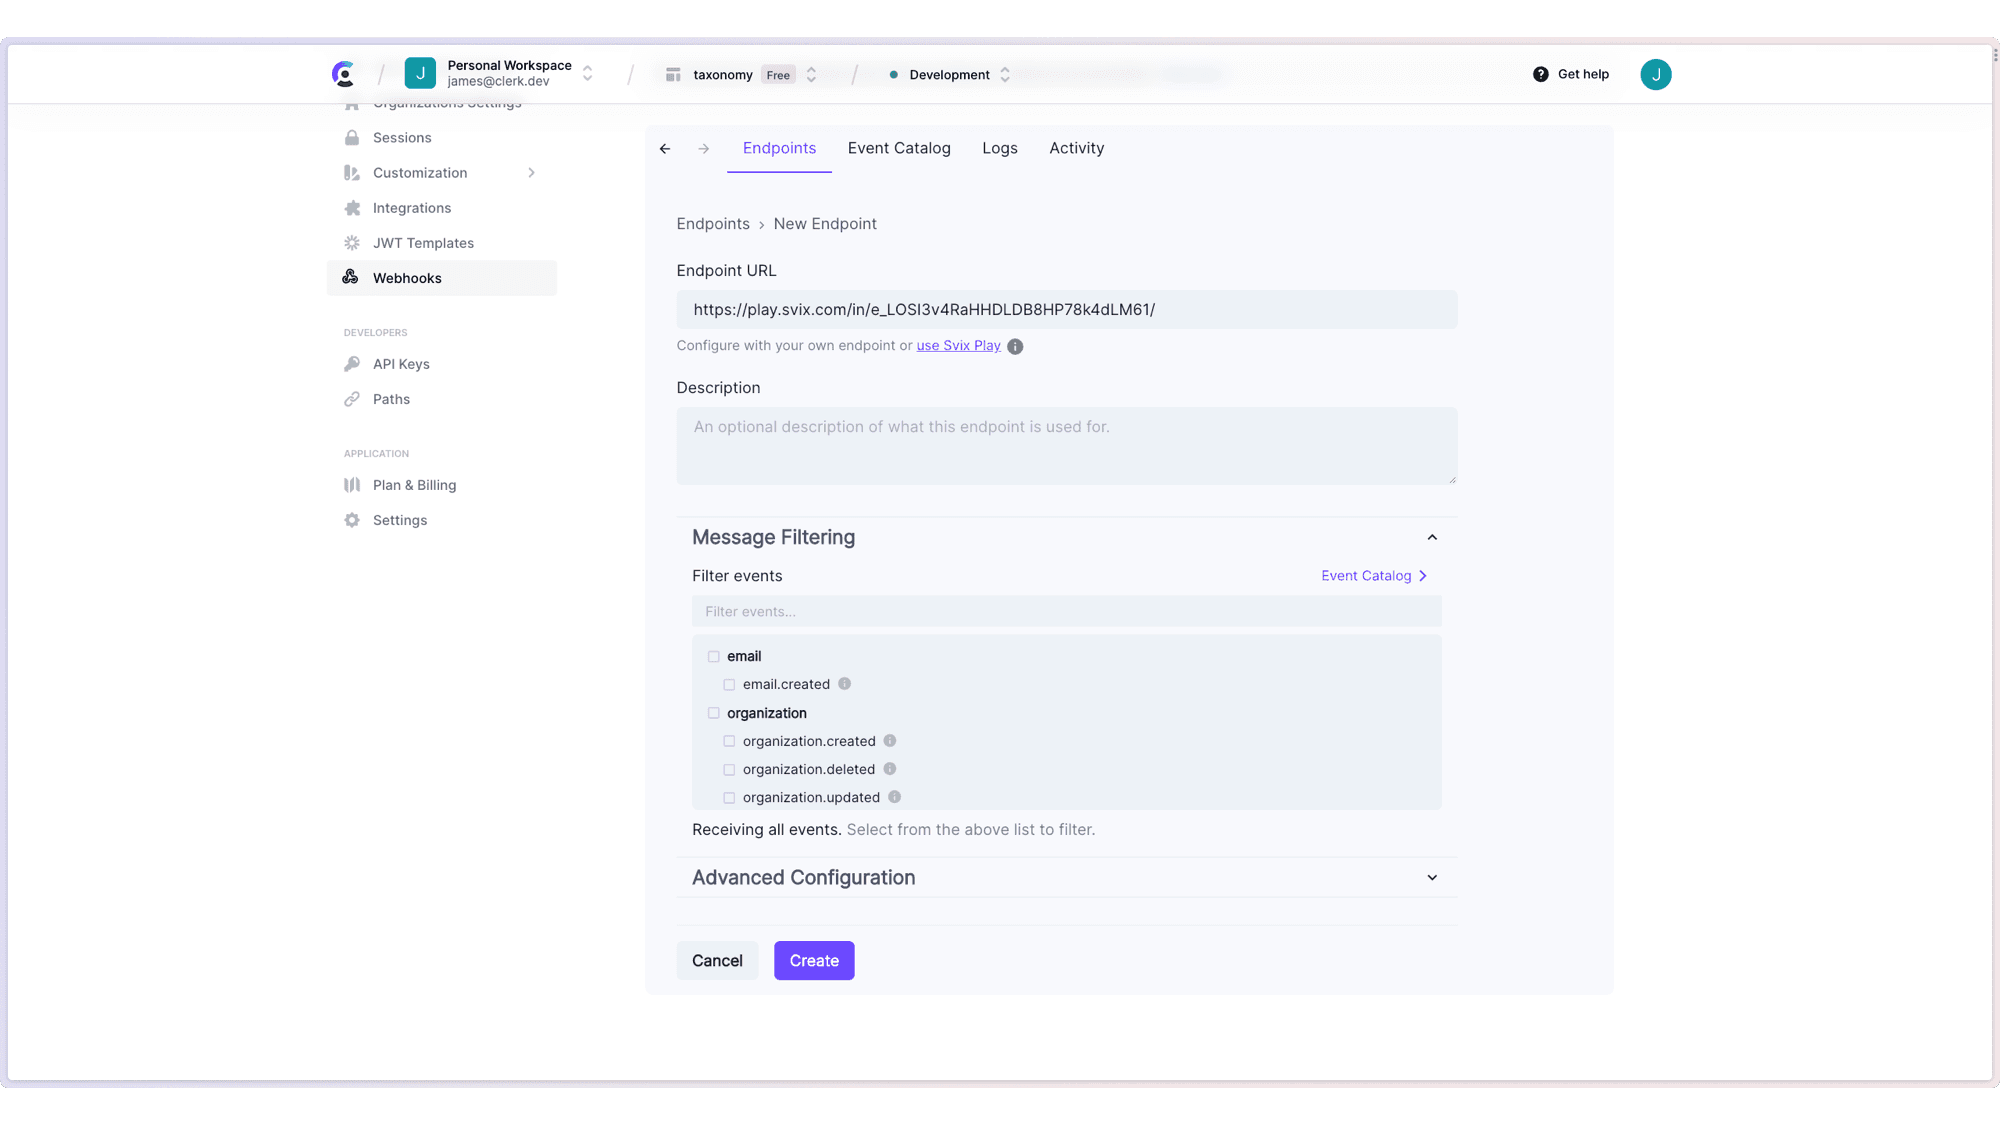
You'll be presented with a form where you can specify the URL of your backend endpoint. This is the URL where Clerk will send the webhook events. You can also specify the events you want to receive. For example, if you only want to receive events related to users, you can select the user option.
Once you click the Create button, you'll be presented with your webhook endpoint dashboard. Here you can see the URL of your endpoint and the events you selected and you can also test your endpoint.
Add your Signing Secret to your .env.local file
To retrieve your Webhook Signing Secret, click on the Webhooks page in the side nav of the Clerk Dashboard.
You will need to set this value as an environment variable in your project. This
guide uses WEBHOOK_SECRET as the key. However, you can set the key to whatever
you like; just be sure to update the code examples. env filename=".env.local" WEBHOOK_SECRET=your_signing_secret
Understanding the webhook payload
The Clerk webhook events are sent as HTTP POST requests with a JSON body. All messages contain:
data- an object that holds information for the event's payload.object- this is alwayseventtype- the type of webhook event. See Supported webhook events for a full list.
Below is an example of a webhook object with no payload:
{
  "data": {
    // The event type specific payload will be here.
  },
  "object": "event",
  "type": "<event>"
}
Additionally messages contain an id string in the headers. To learn more about the payload structure, check out the webhooks reference.
Install the svix package
To get started setting up your endpoint, you will need to install the svix package. Svix provides a package for verifying the webhook signature, making it easy to verify the authenticity of the webhook events.
npm install svixyarn add svixpnpm add svixCreate a webhook endpoint in the /api directory.
import { Webhook } from 'svix'
import { headers } from 'next/headers'
import { WebhookEvent } from '@clerk/nextjs/server'

export async function POST(req: Request) {

  // You can find this in the Clerk Dashboard -> Webhooks -> choose the webhook
  const WEBHOOK_SECRET = process.env.WEBHOOK_SECRET

  if (!WEBHOOK_SECRET) {
    throw new Error('Please add WEBHOOK_SECRET from Clerk Dashboard to .env or .env.local')
  }

  // Get the headers
  const headerPayload = headers();
  const svix_id = headerPayload.get("svix-id");
  const svix_timestamp = headerPayload.get("svix-timestamp");
  const svix_signature = headerPayload.get("svix-signature");

  // If there are no headers, error out
  if (!svix_id || !svix_timestamp || !svix_signature) {
    return new Response('Error occured -- no svix headers', {
      status: 400
    })
  }

  // Get the body
  const payload = await req.json()
  const body = JSON.stringify(payload);

  // Create a new Svix instance with your secret.
  const wh = new Webhook(WEBHOOK_SECRET);

  let evt: WebhookEvent

  // Verify the payload with the headers
  try {
    evt = wh.verify(body, {
      "svix-id": svix_id,
      "svix-timestamp": svix_timestamp,
      "svix-signature": svix_signature,
    }) as WebhookEvent
  } catch (err) {
    console.error('Error verifying webhook:', err);
    return new Response('Error occured', {
      status: 400
    })
  }

  // Get the ID and type
  const { id } = evt.data;
  const eventType = evt.type;

  console.log(`Webhook with and ID of ${id} and type of ${eventType}`)
  console.log('Webhook body:', body)

  return new Response('', { status: 200 })
}import { Webhook } from 'svix'
import { WebhookEvent } from '@clerk/nextjs/server'
import { NextApiRequest, NextApiResponse } from 'next'
import { buffer } from 'micro'
export const config = {
api: {
bodyParser: false,
}
}
export default async function handler(req: NextApiRequest, res: NextApiResponse) {
if (req.method !== 'POST') {
return res.status(405)
}
// You can find this in the Clerk Dashboard -> Webhooks -> choose the webhook
const WEBHOOK_SECRET = process.env.WEBHOOK_SECRET
if (!WEBHOOK_SECRET) {
throw new Error('Please add WEBHOOK_SECRET from Clerk Dashboard to .env or .env.local')
}
// Get the headers
const svix_id = req.headers["svix-id"] as string;
const svix_timestamp = req.headers["svix-timestamp"] as string;
const svix_signature = req.headers["svix-signature"] as string;
// If there are no headers, error out
if (!svix_id || !svix_timestamp || !svix_signature) {
return res.status(400).json({ error: 'Error occured -- no svix headers' })
}
console.log('headers', req.headers, svix_id, svix_signature, svix_timestamp)
// Get the body
const body = (await buffer(req)).toString()
// Create a new Svix instance with your secret.
const wh = new Webhook(WEBHOOK_SECRET);
let evt: WebhookEvent
// Verify the payload with the headers
try {
evt = wh.verify(body, {
"svix-id": svix_id,
"svix-timestamp": svix_timestamp,
"svix-signature": svix_signature,
}) as WebhookEvent
} catch (err) {
console.error('Error verifying webhook:', err);
return res.status(400).json({ 'Error': err })
}
// Get the ID and type
const { id } = evt.data;
const eventType = evt.type;
console.log(`Webhook with and ID of ${id} and type of ${eventType}`)
console.log('Webhook body:', body)
return res.status(200).json({ response: 'Success' })
}The code example assumes a working Express application. Please adjust as needed for your setup and framework of choice.
import { Webhook } from "svix";
import bodyParser from "body-parser";

app.post(
  "/api/webhooks",
  bodyParser.raw({ type: "application/json" }),
  async function (req, res) {
    // Check if the 'Signing Secret' from the Clerk Dashboard was correctly provided
    const WEBHOOK_SECRET = process.env.WEBHOOK_SECRET;
    if (!WEBHOOK_SECRET) {
      throw new Error("You need a WEBHOOK_SECRET in your .env");
    }

    // Grab the headers and body
    const headers = req.headers;
    const payload = req.body;

    // Get the Svix headers for verification
    const svix_id = headers["svix-id"] as string;
    const svix_timestamp = headers["svix-timestamp"] as string;
    const svix_signature = headers["svix-signature"] as string;

    // If there are missing Svix headers, error out
    if (!svix_id || !svix_timestamp || !svix_signature) {
      return new Response("Error occured -- no svix headers", {
        status: 400,
      });
    }

    // Initiate Svix
    const wh = new Webhook(WEBHOOK_SECRET);

    let evt: WebhookEvent;

    // Attempt to verify the incoming webhook
    // If successful, the payload will be available from 'evt'
    // If the verification fails, error out and  return error code
    try {
      evt = wh.verify(payload, {
        "svix-id": svix_id,
        "svix-timestamp": svix_timestamp,
        "svix-signature": svix_signature,
      }) as WebhookEvent;
    } catch (err: any) {
      // Console log and return error
      console.log("Webhook failed to verify. Error:", err.message);
      return res.status(400).json({
        success: false,
        message: err.message,
      });
    }

    // Grab the ID and TYPE of the Webhook
    const { id } = evt.data;
    const eventType = evt.type;

    console.log(`Webhook with an ID of ${id} and type of ${eventType}`);
    // Console log the full payload to view
    console.log("Webhook body:", evt.data);

    return res.status(200).json({
      success: true,
      message: "Webhook received",
    });
  }
);
Add your endpoint to Middleware
Your Route Handler must be made public or ignored by Middleware to allow the request to succeed. The following example will make any webhooks created under app/api/webhooks/ public. See authMiddleware for more information.
import { authMiddleware } from "@clerk/nextjs";

export default authMiddleware({
  publicRoutes: ["/api/webhooks(.*)"],
});

export const config = {
  matcher: ["/((?!.+\\.[\\w]+$|_next).*)", "/", "/(api|trpc)(.*)"],
};
Test the webhook
To test a webhook locally, you can use a tool like ngrok or localtunnel to expose your local server to the internet. You can then use the ngrok URL as the webhook URL in the Clerk Dashboard.
If you are testing webhooks outside of your development, you can use our webhook test requests to test your webhook. In the Clerk Dashboard, go to the Webhooks page, select the webhook endpoint you created, and then select the Testing tab. You can select an event from the Send Event dropdown to see the example payload and to send a test message to your application.
Feedback
Last updated on