<UserProfileView /> component
| iOS | Android |
|---|---|
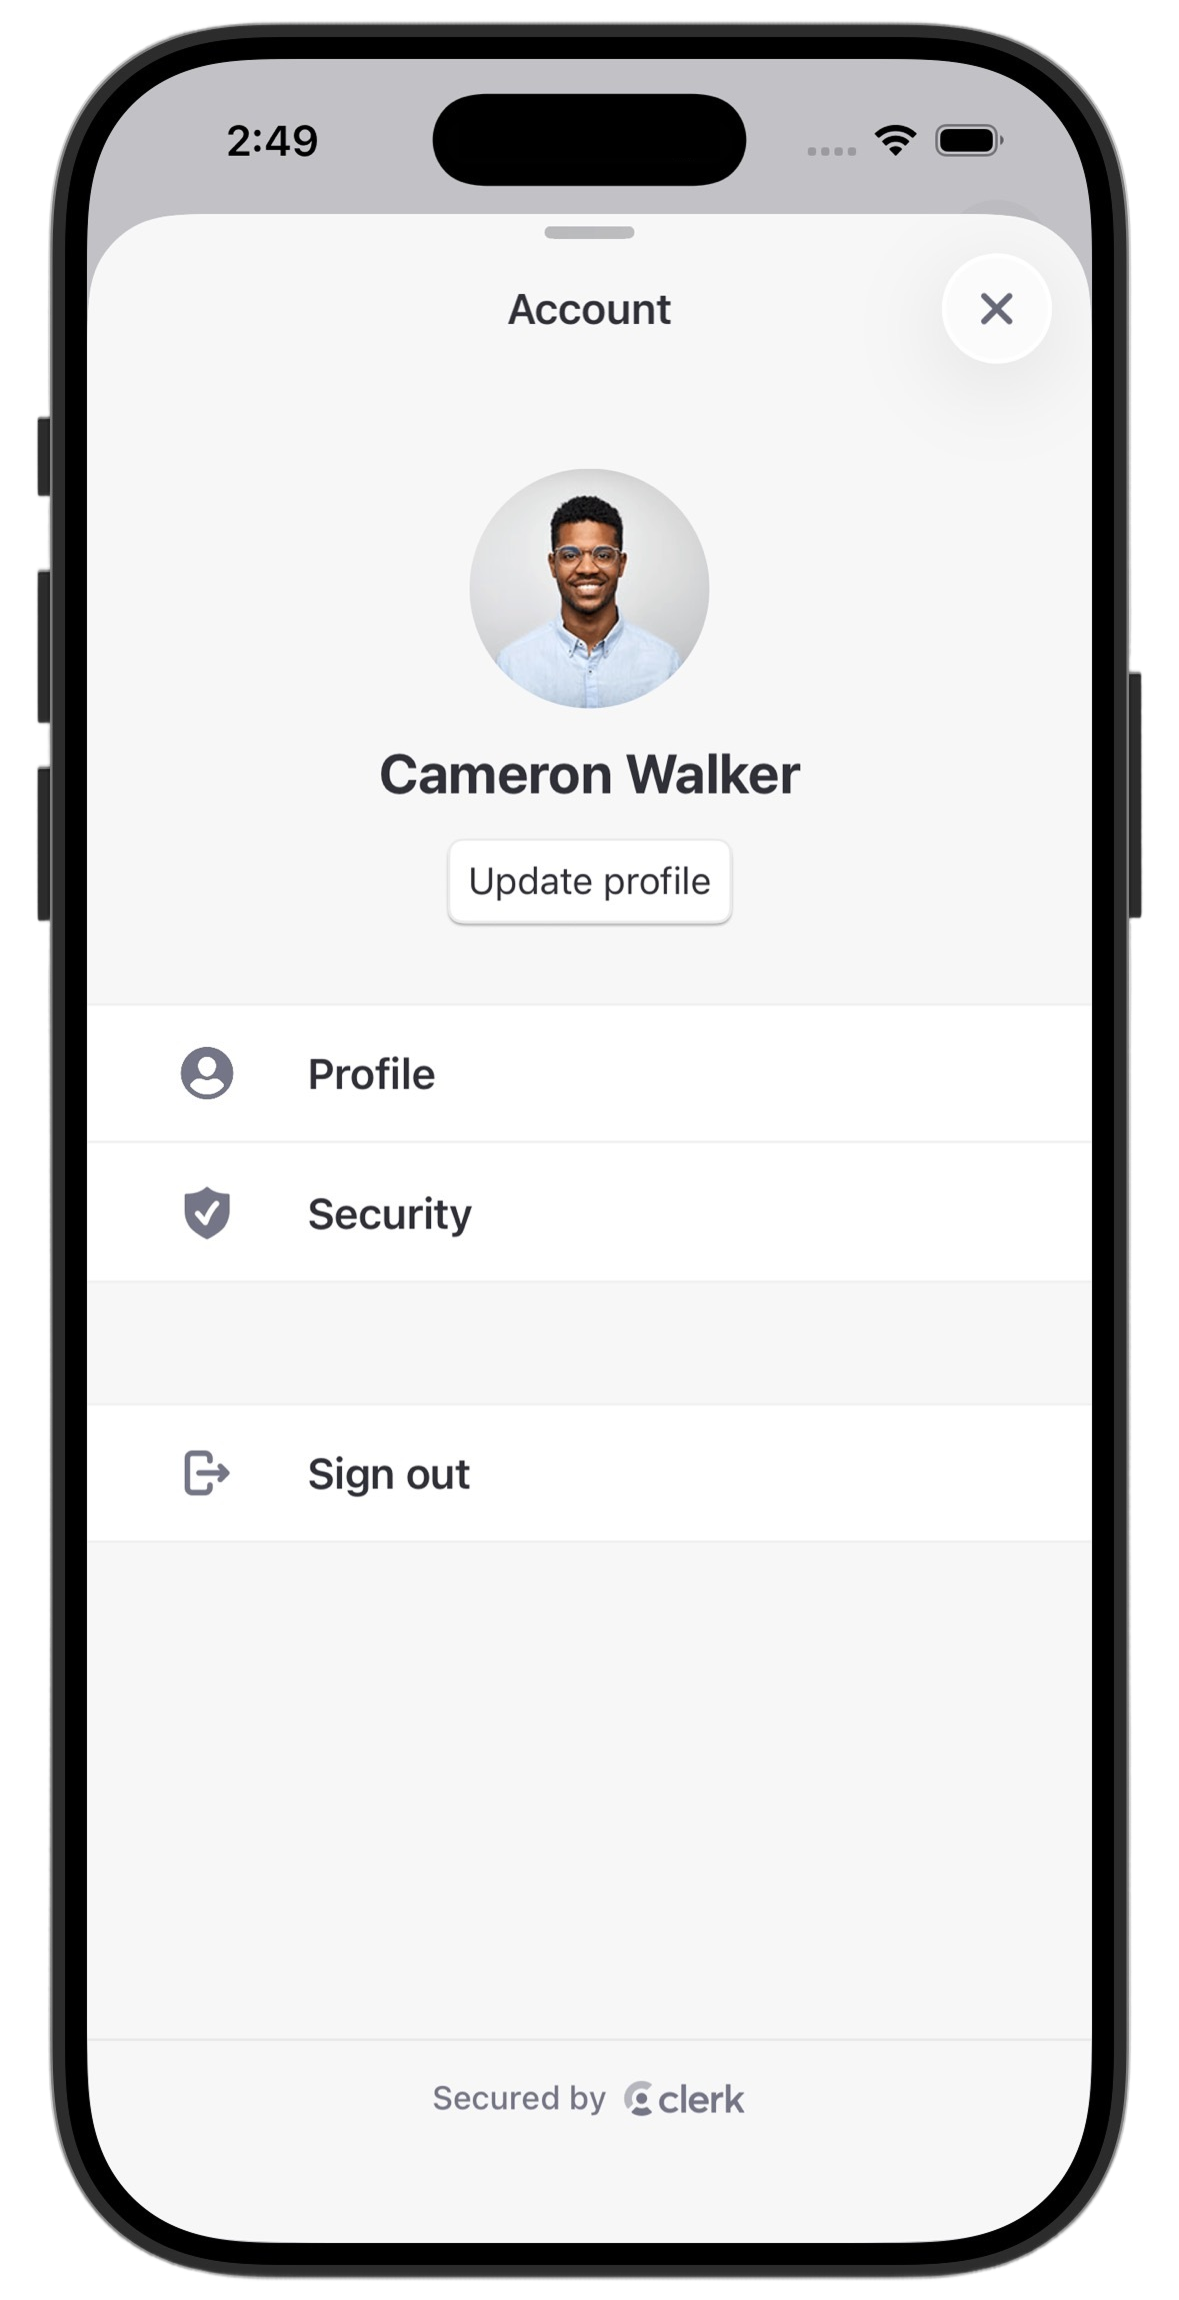 | 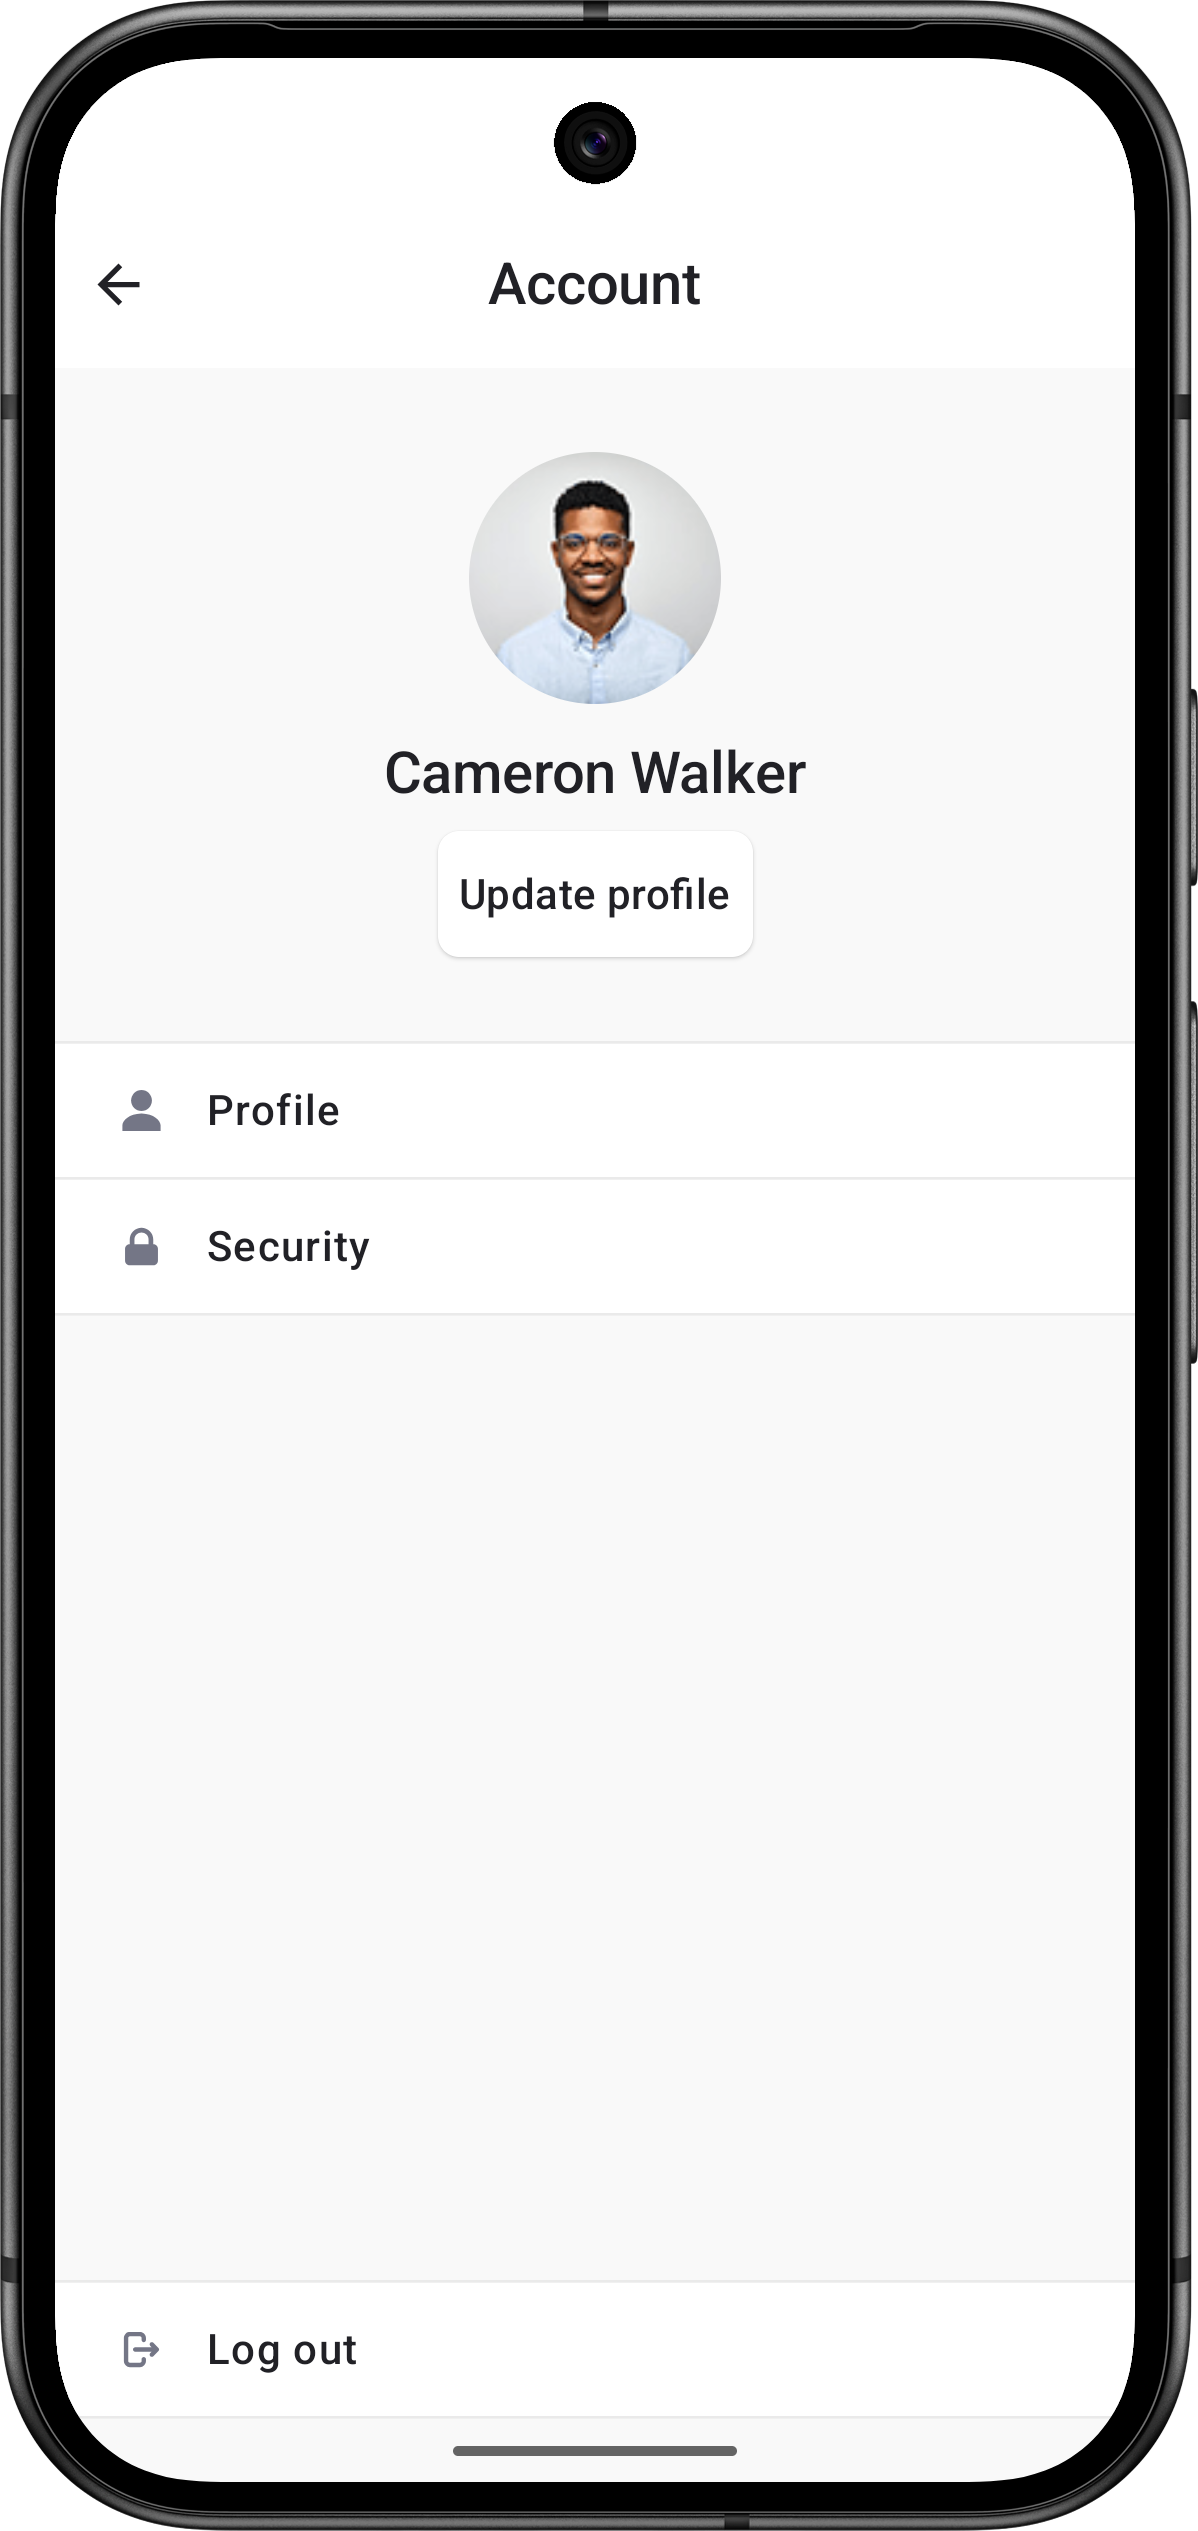 |
The <UserProfileView /> component renders a fully native profile management interface using SwiftUI on iOS and Jetpack Compose on Android. It allows users to manage:
- Profile details
- Email addresses
- Phone numbers
- Multi-factor authentication (MFA)
- Passkeys
- Connected accounts
- Active sessions
Usage
The <UserProfileView /> renders inline in your React Native view hierarchy, so you can place it in a modal, sheet, route, full-screen view, or any other layout that fits your app.
The following example demonstrates one way to render <UserProfileView /> inside a React Native <Modal>. The native dismiss button is shown by default. Use onDismiss to close the modal in React Native state.
import { UserProfileView } from '@clerk/expo/native-components'
import { useState } from 'react'
import { Button, Modal, StyleSheet, View } from 'react-native'

export default function HomeScreen() {
  const [isAuthOpen, setIsAuthOpen] = useState(false)

  return (
    <View style={styles.container}>
      <Button title="Account" onPress={() => setIsAuthOpen(true)} />
      <Modal
        animationType="slide"
        visible={isAuthOpen}
        presentationStyle="pageSheet"
        onRequestClose={() => setIsAuthOpen(false)}
      >
        <UserProfileView onDismiss={() => setIsAuthOpen(false)} />
      </Modal>
    </View>
  )
}

const styles = StyleSheet.create({
  container: {
    flex: 1,
    justifyContent: 'center',
    alignItems: 'center',
  },
})
When rendering <UserProfileView /> directly in a full-screen view, pass isDismissible={false} if users shouldn't be able to dismiss the view.
import { UserProfileView } from '@clerk/expo/native-components'
import { useAuth } from '@clerk/expo'
import { useRouter } from 'expo-router'
import { useEffect } from 'react'

export default function ProfileScreen() {
  const { isLoaded, isSignedIn } = useAuth({ treatPendingAsSignedOut: false })
  const router = useRouter()

  useEffect(() => {
    if (isLoaded && !isSignedIn) {
      router.replace('/(auth)/sign-in')
    }
  }, [isLoaded, isSignedIn, router])

  return <UserProfileView isDismissible={false} style={{ flex: 1 }} />
}
To push <UserProfileView /> onto your app's navigation stack, hide the route's header and pass onHostBack. The component keeps its native header, so its screen titles, back buttons, swipe-back gestures, and transitions remain native.
Passing onHostBack shows a back button on the component's first screen, where it has no screen of its own to return to. The callback runs when the button is tapped. Pop your route in response.
import { UserProfileView } from '@clerk/expo/native-components'
import { Stack, useRouter } from 'expo-router'

export default function ProfileScreen() {
  const router = useRouter()

  return (
    <>
      <Stack.Screen options={{ headerShown: false }} />
      <UserProfileView isDismissible={false} onHostBack={() => router.back()} style={{ flex: 1 }} />
    </>
  )
}
The component never leaves the route on its own, so use useAuth(), useUser(), or useSession() to react when the user signs out.
Add custom pages
Pass the customPages property to add native rows to the root profile screen. Each row can open React Native content or an external URL. Every custom page requires a unique path and must define either content or href.
The following example adds a page that renders React Native content and a row that opens Clerk's documentation. Use useUserProfileCustomPageNavigation() to navigate within the native profile from your custom content.
import { UserProfileView, useUserProfileCustomPageNavigation } from '@clerk/expo/native-components'
import { Button, Text, View } from 'react-native'

function APIKeysPage() {
  const { navigateBack } = useUserProfileCustomPageNavigation()

  return (
    <View style={{ flex: 1, justifyContent: 'center', padding: 24 }}>
      <Text style={{ fontSize: 24, marginBottom: 16 }}>API keys</Text>
      <Button title="Back to profile" onPress={() => void navigateBack()} />
    </View>
  )
}

export default function ProfileScreen() {
  return (
    <UserProfileView
      isDismissible={false}
      customPages={[
        {
          path: 'api-keys',
          label: 'API keys',
          icon: 'key',
          content: <APIKeysPage />,
        },
        {
          path: 'docs',
          label: 'Documentation',
          icon: 'book',
          href: 'https://clerk.com/docs',
        },
      ]}
    />
  )
}
React Native content mounts when its row is selected. Rows appear at the end of the profile section by default. Use placement to insert a row at the start or end of a section, or before or after a built-in row.
The following example places a custom row before the built-in security row:
<UserProfileView
  customPages={[
    {
      path: 'support',
      label: 'Support',
      icon: 'info',
      placement: { type: 'before', row: 'security' },
      content: <SupportPage />,
    },
  ]}
/>- Name
content- Type
ReactNode- Description
React Native content rendered when the row is selected. This property can't be used with
href.
- Name
href- Type
string- Description
URL opened when the row is selected. This property can't be used with
content.
- Name
icon?- Type
'user' | 'profile' | 'security' | 'settings' | 'billing' | 'key' | 'lock' | 'email' | 'phone' | 'add' | 'switch' | 'users' | 'warning' | 'info' | 'globe' | 'folder' | 'book'- Description
Icon displayed in the native profile row. Defaults to
'settings'.
- Name
label- Type
string- Description
Text displayed in the native profile row.
- Name
path- Type
string- Description
A unique path that identifies the page. Pass this value to the custom page navigation hook's
push()method to open the page from another custom page.
- Name
placement?- Type
{ type: 'sectionStart' | 'sectionEnd'; section: 'profile' | 'account' } | { type: 'before' | 'after'; row: 'manageAccount' | 'security' | 'switchAccount' | 'addAccount' | 'signOut' }- Description
Where to insert the row relative to Clerk's built-in sections or rows. Defaults to
{ type: 'sectionEnd', section: 'profile' }.
- Name
customPages- Type
UserProfileCustomPage[]- Description
Custom pages displayed as rows in the root profile screen. See Add custom pages for the supported options.
- Name
isDismissible- Type
boolean- Description
Whether the profile view can be dismissed by the user. When
true, a dismiss button appears in the native navigation bar. Whenfalse, no dismiss button is shown. Defaults totrue.
- Name
onDismiss- Type
() => void- Description
A callback that runs when the user dismisses the native profile view. Use this to update your app's presentation state, such as closing a React Native
<Modal>.
- Name
onHostBack- Type
() => void- Description
A callback that runs when the user taps the back button on the profile view's first screen. Passing the callback adds this button. Use it when the component fills a route whose header is hidden, and pop your route in response. The component keeps its native header, so navigation inside the profile view stays native.
- Name
style- Type
StyleProp<ViewStyle>- Description
Style applied to the container view.
Feedback
Last updated on