UserProfileView
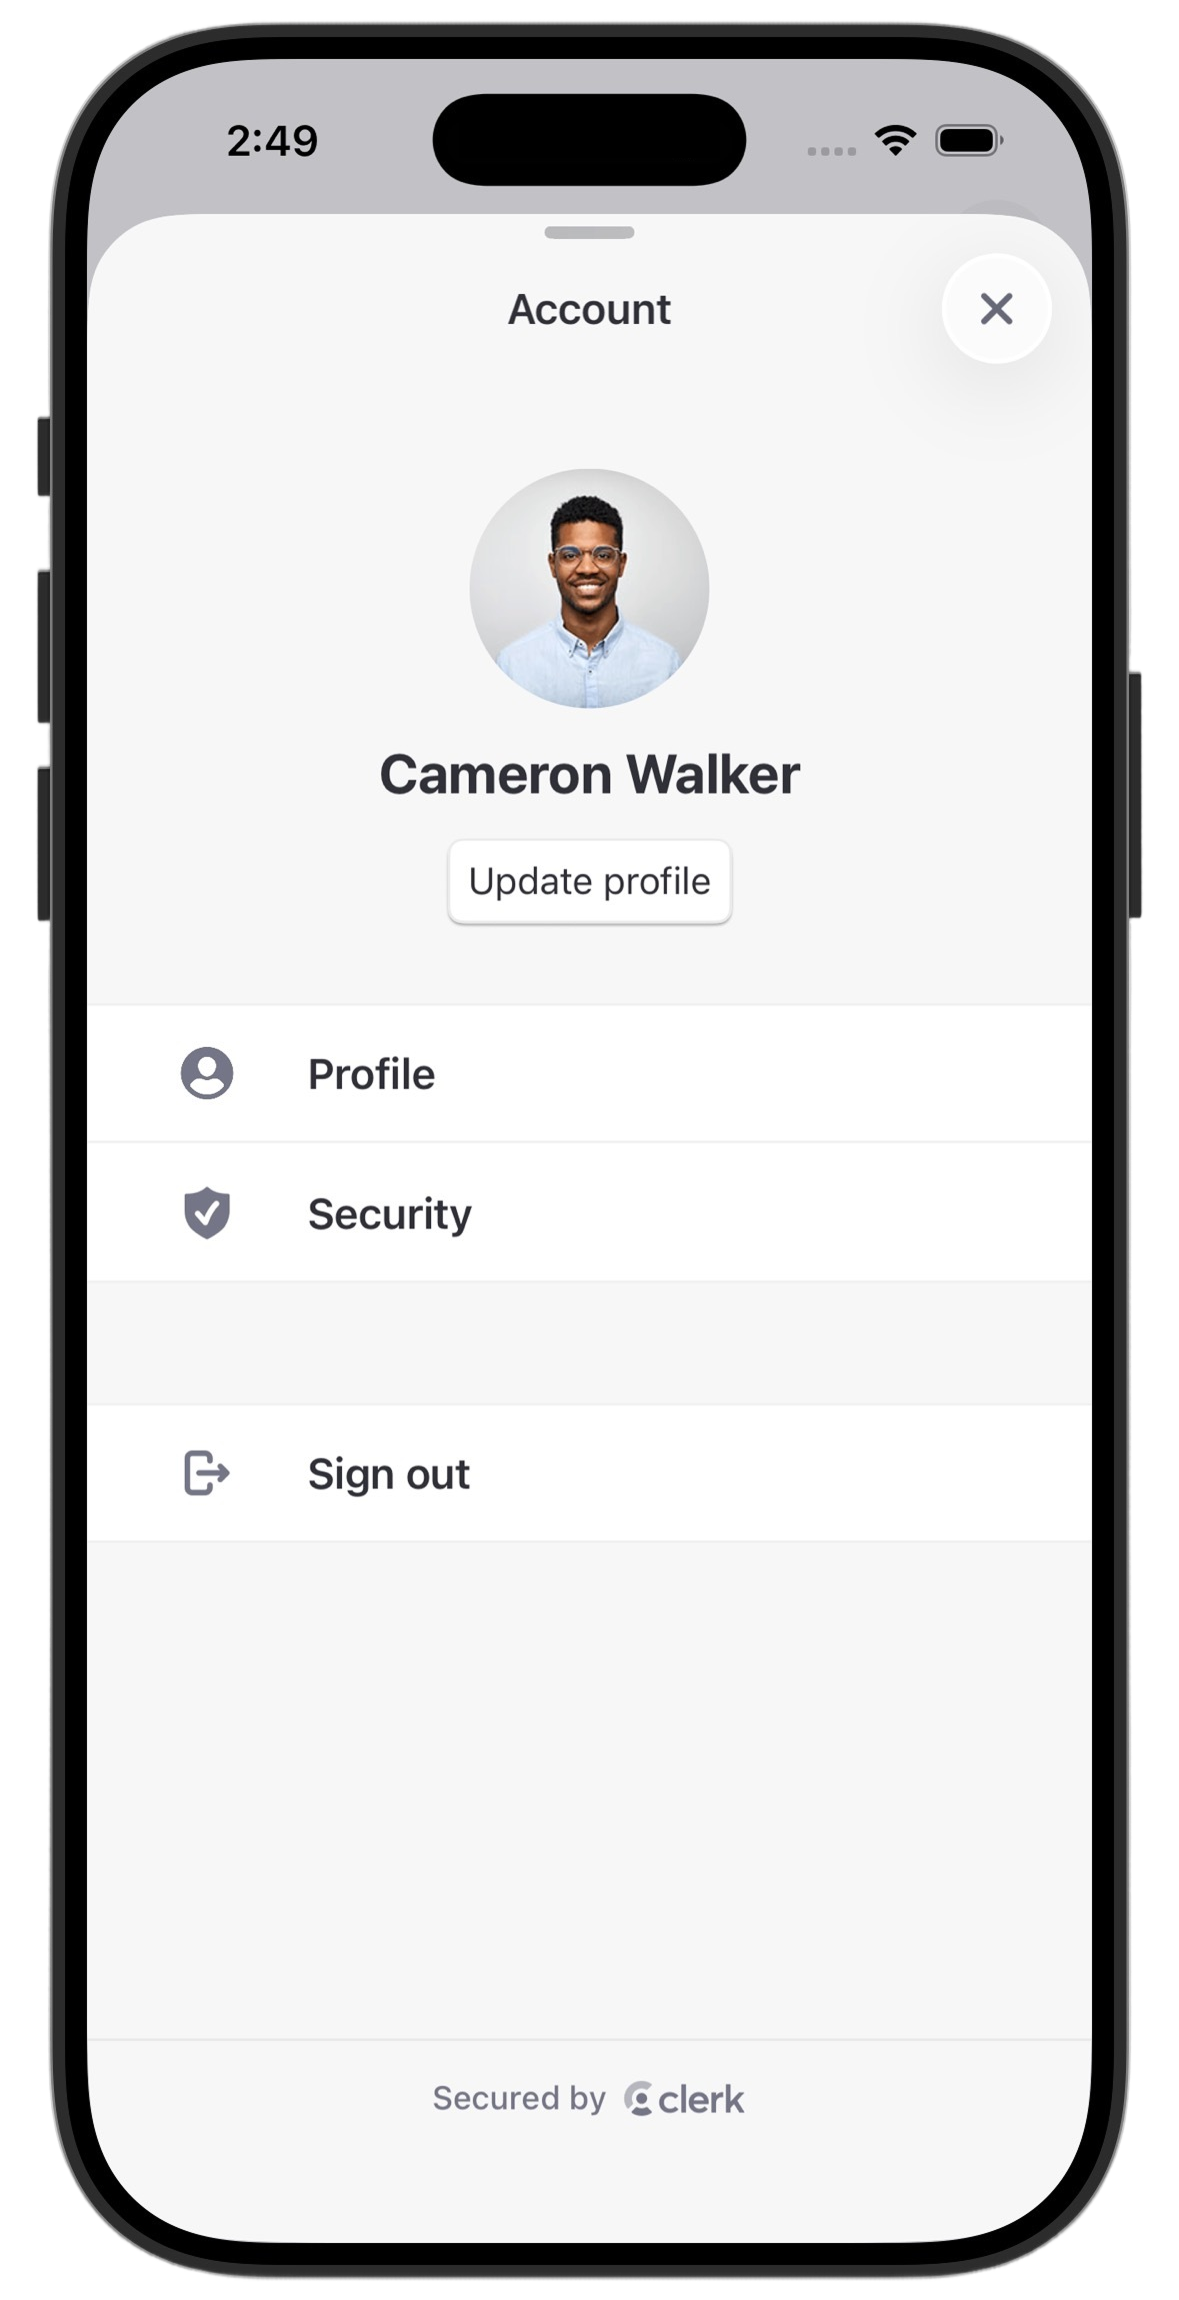
The UserProfileView renders a comprehensive user profile interface that displays user information and provides account management options. It includes personal information, security settings, account switching, and sign-out functionality.
- Name
isDismissible- Type
Bool- Description
Whether the view can be dismissed by the user. When
true, a dismiss button appears in the navigation bar and the view can be used in sheets or other dismissible contexts. Whenfalse, no dismiss button is shown, making it suitable for fullscreen usage. Defaults totrue.
- Name
navigationPath- Type
Binding<NavigationPath>?- Description
A binding to the
NavigationPathof a parentNavigationStack. When provided,UserProfileViewdoesn't create its ownNavigationStackand pushes its screens onto the parent's path instead. Defaults tonil.
Modifiers
Apply the following modifiers to a UserProfileView to add your own rows and configure connected accounts.
- Name
userProfileDestination(_:)- Type
@ViewBuilder (Route) -> some View- Description
Builds the view to push when the user selects a custom row. The closure receives the selected row's
route.
- Name
userProfileOAuthConfig(_:)- Type
- [OAuthProviderConfig]
- Description
Requests additional OAuth scopes or prompts per provider when the user connects or reconnects a social account. When an existing connected account hasn't approved every configured scope,
UserProfileViewoffers to reconnect it. See Request additional OAuth scopes after sign-up for an example.
- Name
userProfileRows(_:)- Type
- [UserProfileCustomRow<Route>]
- Description
Custom rows to show on the root profile screen, alongside Clerk's built-in rows. Rows that share a placement show in array order.
- Name
icon- Type
UserProfileRowIcon- Description
The row's icon. Pass
.system(name:)for an SF Symbol, or.asset(name:width:height:)for an image in your app's asset catalog. Clerk renders asset icons as templates, tinted the same color as its built-in row icons, and sizes them 24 × 24 points by default.
- Name
placement- Type
UserProfileCustomRowPlacement- Description
Where to insert the row relative to Clerk's built-in rows:
.sectionStart(_:)or.sectionEnd(_:): The start or end of the.profileor.accountsection.before(_:)or.after(_:): Before or after a built-in row (.manageAccount,.security,.switchAccount,.addAccount, or.signOut)
Defaults to
.sectionEnd(.profile).A row placed before or after a built-in row appears only when that built-in row does.
.switchAccountand.addAccountappear only in multi-session applications, and.switchAccountonly when the user has more than one session. To always show a row in the account section, use.sectionStart(.account)or.sectionEnd(.account).
- Name
route- Type
Route: Hashable- Description
The value passed to
userProfileDestination(_:), or pushed onto yournavigationPath, when the user selects the row.
- Name
title- Type
LocalizedStringKey | String- Description
The row's title.
- Name
additionalScopes- Type
[String]- Description
Additional OAuth scopes to request from the provider. Defaults to
[].
- Name
prompts- Type
[OIDCPrompt]- Description
OpenID Connect prompts to send to the provider:
.none,.login,.consent, or.selectAccount. Defaults to[].
- Name
provider- Type
OAuthProvider- Description
The provider the configuration applies to, such as
.google.
The following examples show how to use the UserProfileView in your iOS app.
Dismissible sheet presentation
Present UserProfileView as a dismissible sheet when you want users to be able to close the profile view and return to the previous screen.
import SwiftUI
import ClerkKit
import ClerkKitUI

struct MainView: View {
  @Environment(Clerk.self) private var clerk
  @State private var profileIsPresented = false

  var body: some View {
    VStack {
      if clerk.user != nil {
        Button("Show Profile") {
          profileIsPresented = true
        }
      }
    }
    .sheet(isPresented: $profileIsPresented) {
      UserProfileView()
    }
  }
}
Fullscreen profile view
Use UserProfileView as a fullscreen view when you want to dedicate the entire screen to profile management.
import SwiftUI
import ClerkKit
import ClerkKitUI

struct ProfileView: View {
  @Environment(Clerk.self) private var clerk

  var body: some View {
    if clerk.user != nil {
      UserProfileView(isDismissible: false)
    }
  }
}
Embed in your own navigation stack
The following example pushes UserProfileView onto your own NavigationStack.
import SwiftUI
import ClerkKit
import ClerkKitUI

enum AppRoute: Hashable {
  case profile
}

struct ContentView: View {
  @Environment(Clerk.self) private var clerk
  @State private var path = NavigationPath()

  var body: some View {
    NavigationStack(path: $path) {
      VStack {
        if clerk.user != nil {
          Button("Show Profile") {
            path.append(AppRoute.profile)
          }
        }
      }
      .navigationDestination(for: AppRoute.self) { route in
        switch route {
        case .profile:
          UserProfileView(isDismissible: false, navigationPath: $path)
        }
      }
    }
  }
}
Add custom rows
The following example adds a Billing row after the built-in Security row and a Preferences row before Sign out. When the user selects a row, the view pushes what userProfileDestination(_:) returns for its route.
import SwiftUI
import ClerkKit
import ClerkKitUI

enum ProfileRoute: Hashable {
  case billing
  case preferences
}

struct ProfileView: View {
  var body: some View {
    UserProfileView()
      .userProfileRows([
        .init(route: ProfileRoute.billing, title: "Billing", icon: .system(name: "creditcard"), placement: .after(.security)),
        .init(route: ProfileRoute.preferences, title: "Preferences", icon: .system(name: "gear"), placement: .before(.signOut)),
      ])
      .userProfileDestination { (route: ProfileRoute) in
        switch route {
        case .billing:
          // Replace this placeholder with the custom view for your Billing row.
          BillingView()
        case .preferences:
          // Replace this placeholder with the custom view for your Preferences row.
          Text("Preferences")
        }
      }
  }
}
A custom destination can navigate programmatically with UserProfileNavigator, which UserProfileView adds to the environment when it manages its own NavigationStack. Call push(_:) to push another route, or popToRoot() to return to the root profile screen.
struct BillingView: View {
  @Environment(UserProfileNavigator<ProfileRoute>.self) private var navigator

  var body: some View {
    Button("Done") {
      navigator.popToRoot()
    }
  }
}
The navigator's route type must match your custom rows, such as UserProfileNavigator<ProfileRoute>, or reading it crashes. If you pass a navigationPath, UserProfileView doesn't use userProfileDestination(_:). Register .navigationDestination(for:) on your own NavigationStack and push routes onto your path instead. Those destinations have no navigator, so don't read one in them.
Customization
To learn how to customize Clerk views, see the dedicated guide.
If Clerk's prebuilt views don't meet your specific needs or if you require more control over the logic, you can rebuild the existing Clerk flows using the Clerk API. For more information, see the custom flow guides.
Feedback
Last updated on